Building an Ethereum Wallet with OutSystems
Recently, I've helped a bank build a POC payment system that works between customers. Their design ultimately resembled a cryptocurrency wallet and it inspired me to create such a wallet using OutSystems. Specifically, a wallet to send and receive Ether (ETH), the digital currency powered by the Ethereum project.
Choosing an API
Coinbase, Blockchain.info, and BlockCypher allow you to create a wallet and send transactions through the respective blockchains. I've selected BlockCypher because it allows me to control my private keys and it provides a test network using BETH instead of ETH.
The industry has written a lot about wallet security, but it looks like they’ve yet to reach a de facto standard. On the one hand, slightly relaxed security (e.g., 2-factor authentication using SMS codes) has led to hacked wallets. On the other, hyper security has led to lost wallet access due to misplaced passphrases.
MyEtherWallet has an interesting approach: They provide a passphrase, a key store file, hardware wallet integrations, and a print backup that looks like this (don't worry, you won’t have to print anything for this demo).
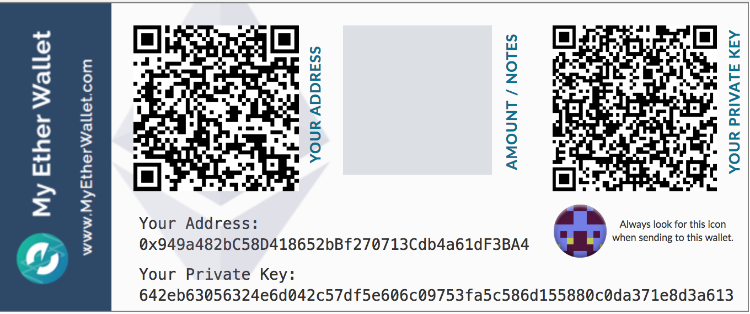
Although MyEtherWallet does not keep any information about the wallets themselves (being a wallet creation and ETH transfer service), sophisticated phishing attacks with bad certificates managed to hack their way into user wallets. The end-user is ultimately the weakest security link.
So if you plan to build such an application, consider putting extra thought into security and how to best educate users about their wallets and potential security threats.
Building the App
I built a sample application, Ethereum Wallet, to leverage the BlockCypher network by incorporating the BlockCypher Forge component. In it, you’ll find the ability to send BETH, receive BETH, check your balance, and more.
My first step was to create an address for each user. On initial launch, Ethereum Wallet creates an address for the device and stores both the address and keys in the device’s native keystore. For simplicity’s sake, the demo does not allow users to import existing credentials (but that functionality is possible).
And since this app uses BlockCypher’s test network, we can use their faucet to magically fund our wallets. Their rules limit us to fund no more than 1 BETH at a time, and no test address can contain more than a total of 15 BETH.
For the interface, I provided four main screens: home, receive, send, and settings. To send BETH, the app needs to work with addresses that look like this: 7eb4b2757e4467498231128d8ea4eff1abff8d59.
I didn’t expect a user to type all of that without making a mistake, and neither does the rest of the cryptocurrency world. We solved this issue by supplying QR codes*, and that’s what I’ve done here. To receive BETH the app displays a QR code* address for the sender (also an Ethereum Wallet user) to scan using their camera.
Run It On Your Device
To get Ethereum Wallet running on your devices, follow these steps.
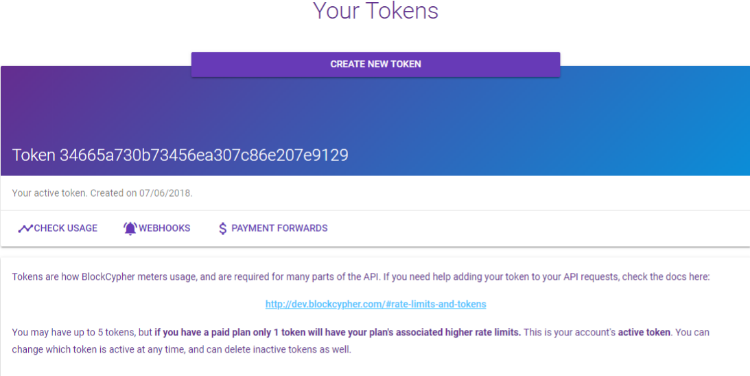
1. Create a Token
The app will run fine without a BlockCypher token but will prohibit users from sending/receiving BETH. To create a token, sign up for a free account at BlockCypher.
BlockCypher generates your token immediately after account creation and displays it like so:
2. Download Ethereum Wallet to OutSystems
Download Ethereum Wallet from the OutSystems Forge. During installation, Ethereum Wallet will also install several dependencies. If one fails to install—the Mobile QRCode plugin, for example—download it directly from the Forge before you continue.
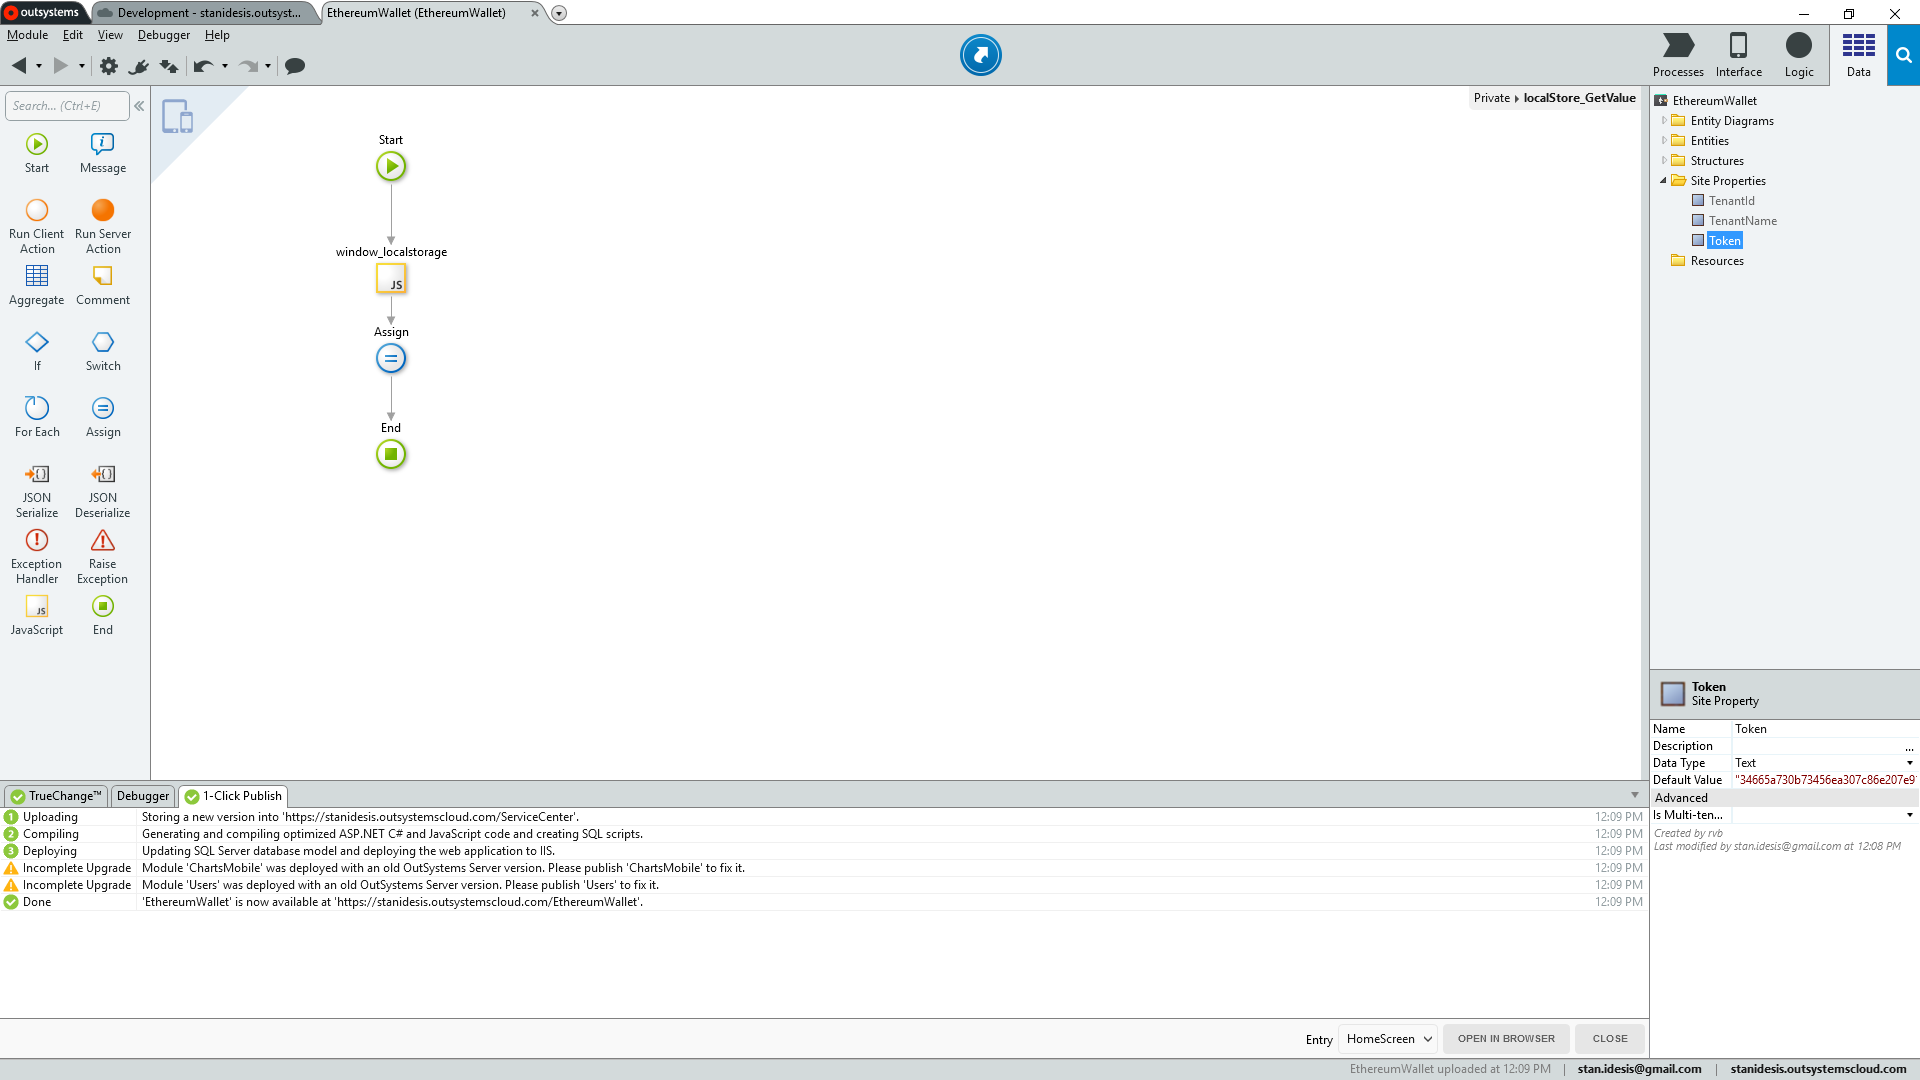
3. Set API Token
Once installed, open the Ethereum Wallet module and navigate to the data tab. Under Site Properties > Token, paste your BlockCypher token from step 1 into the default text value for this site property, as shown below.
Then publish Ethereum Wallet to your environment.
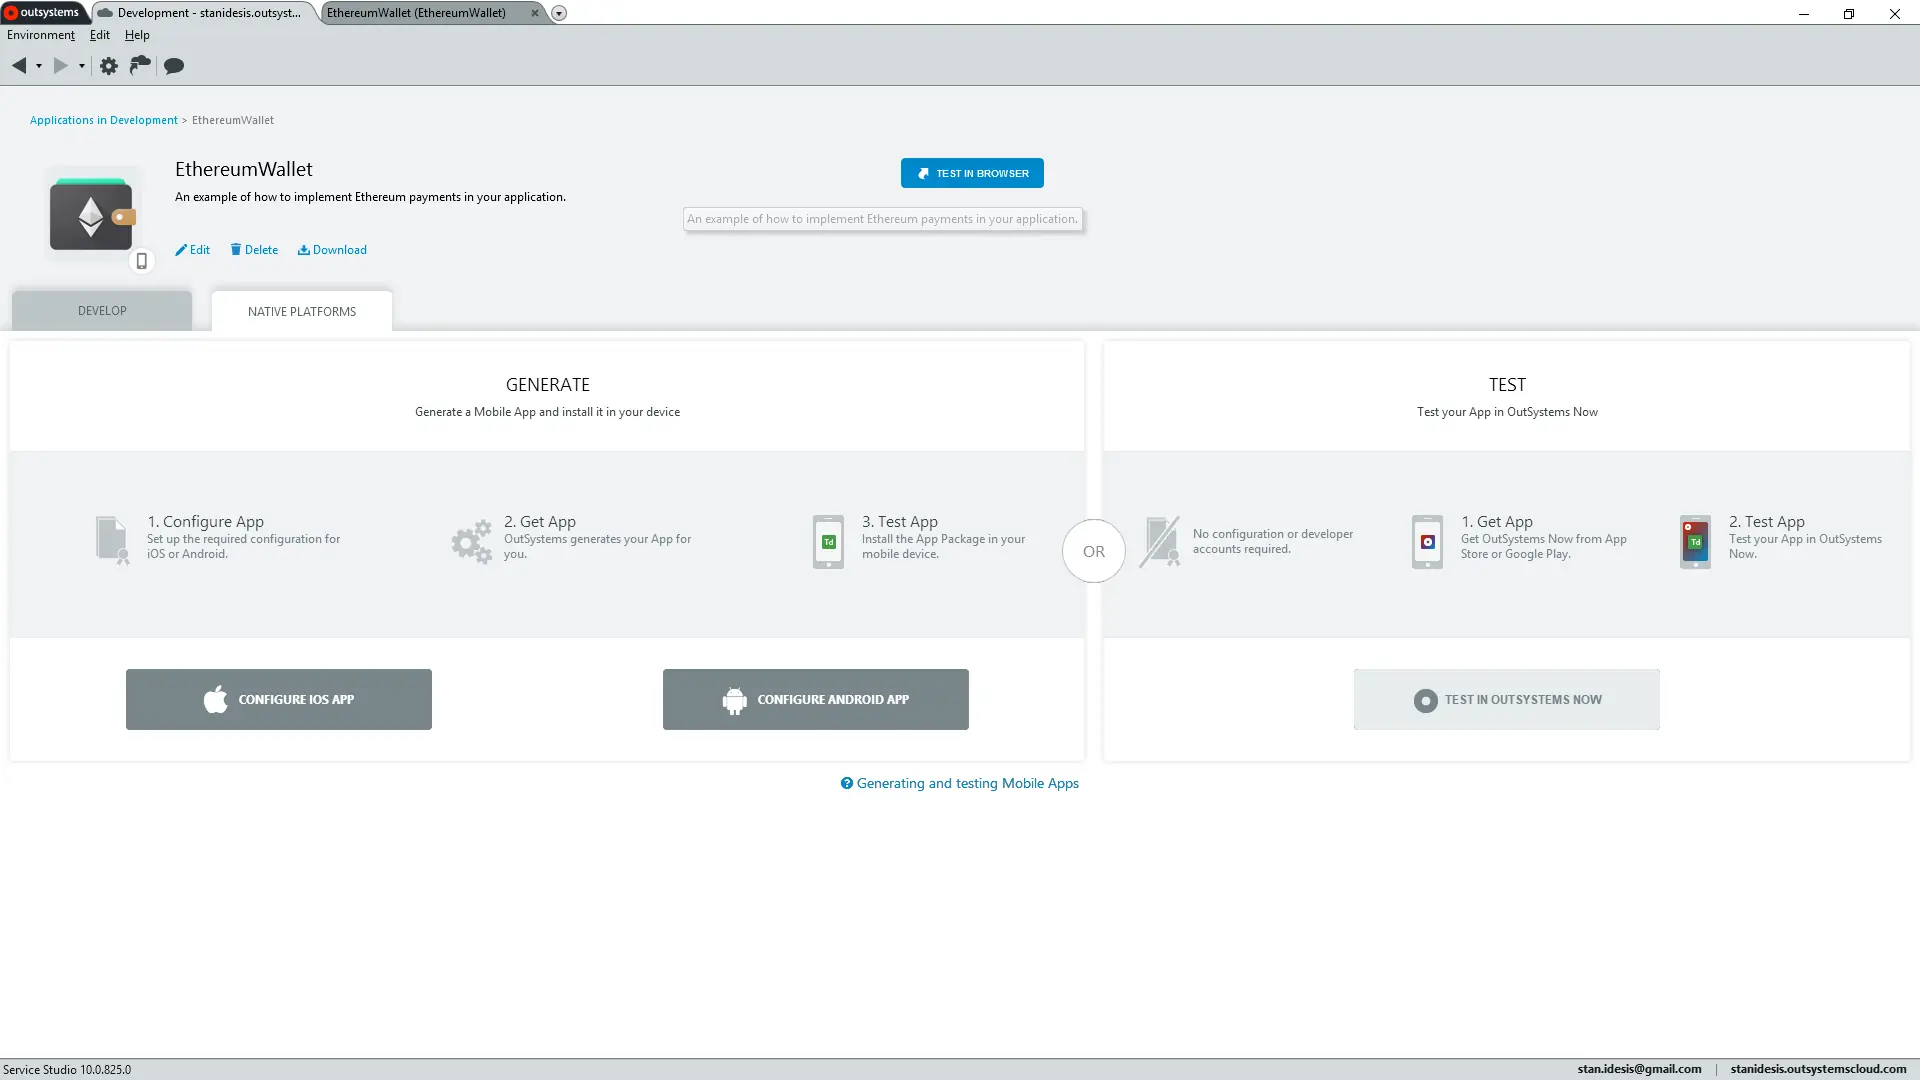
4. Build Native Applications
Unfortunately, Ethereum Wallet requires mobile plugins not provided through OutSystems One, so you must run a full build of this test application to have it work on your device. To do so for Android (similar to iOS), navigate to your EthereumWallet project from within Service Studio, and tab over to Native Platforms:
Click Configure Android App, which brings you to this next screen:
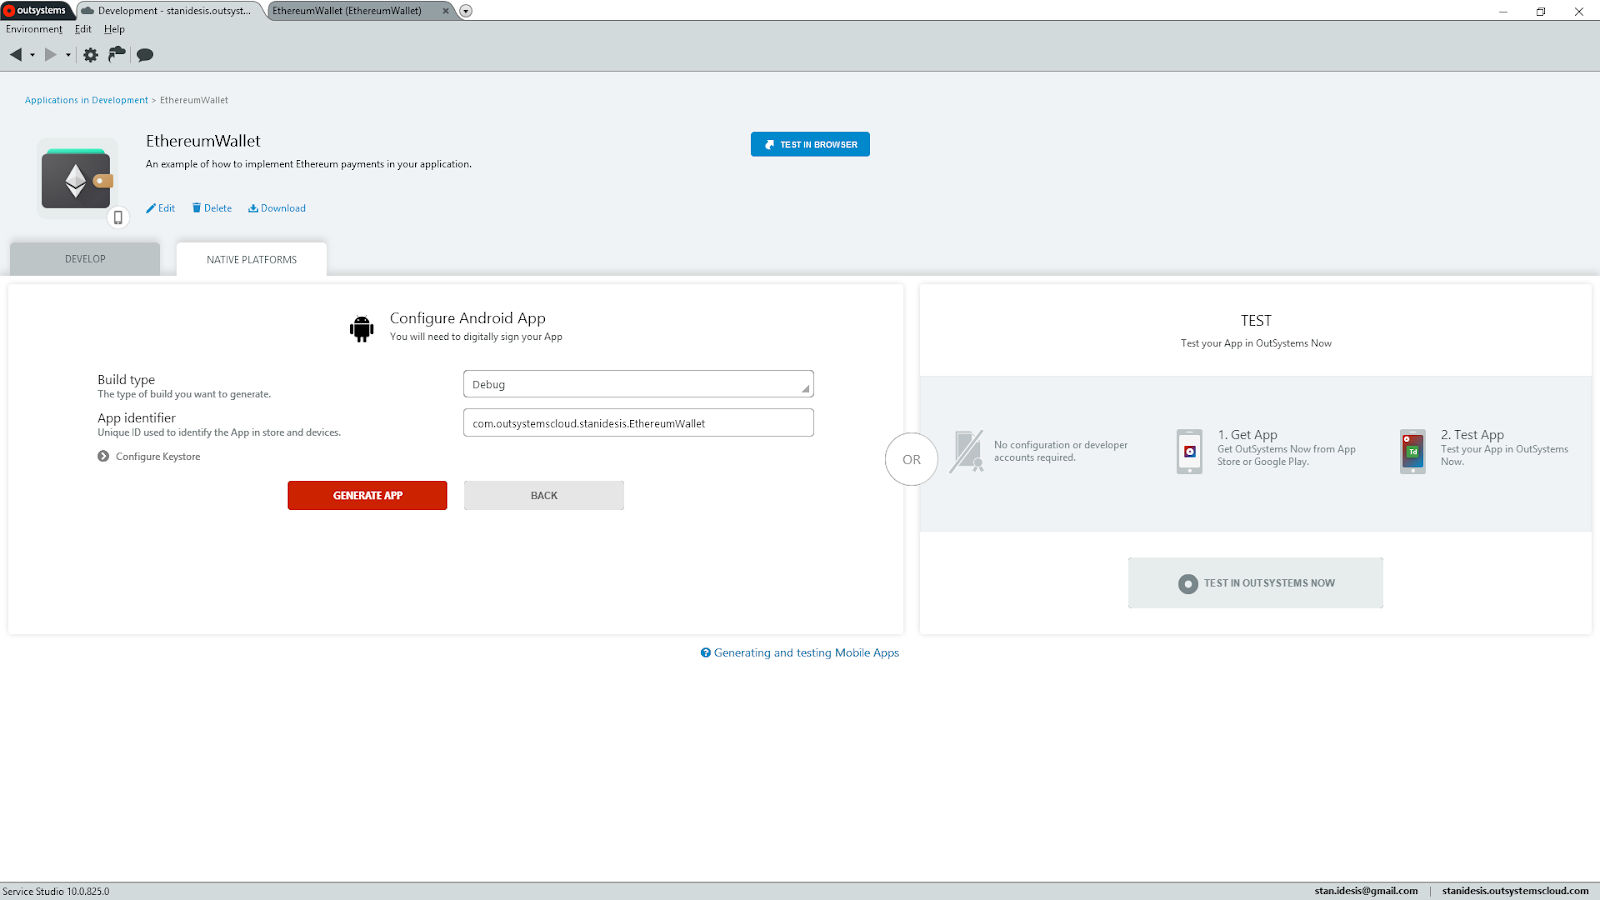
I’ve left the default information, but you can customize the package name here. Then click Generate App. After a moment’s wait, the build will finish, and a QR code appears:

Repeat this process for iOS if you work with Apple devices or want a cross-platform BETH transacting experience. ;-)
5. Install on Two or More Devices
On iOS, use the native camera app to scan the QR code. On Android, use a QR code scanner application, like QR Code Reader, to read the URL and visit the site. The site will look like this:
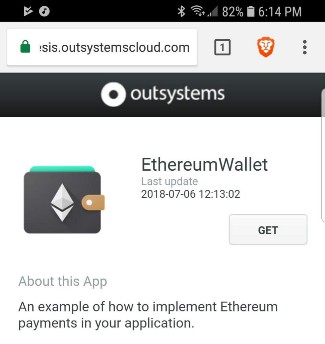
Download the installation package and install the app manually. If you’ve never done this before, this step may require you to enable application installations from unknown sources before you continue.
6. Lock Your Device
If you do not have security protocols protecting your device, Ethereum Wallet will fail to access the keystore. Make sure your device is secured by fingerprint, code, or another method of security, and that your device encrypts your personal data.
7. Launch
In the example below, I’ve installed Ethereum Wallet on two devices. The app immediately generates the address for each device and funds both wallets with a single BETH coin. These transactions take a few moments to verify across the network but soon after become available to trade.
QR CODE is a registered trademark of Denso Wave Incorporated.*