No More Horror Stories:
How to Publish Apps in Stores
I like stories. Excellent ones. And as I see it, mobile application development is always a really good one. From the conception to the release, you go through all the stages of a good plot. First, there’s exposition, where you start creating the setup for what your app will be doing. It’s followed by rising action, where you do all the development, have setbacks, small victories, and everyone is a bit frantic. But, then it’s onto….
The climax. This is the beautiful part where you have a working app after all that stress. Everyone is full of energy and enthusiasm, and you feel great. This is followed by the falling action, where everything that has been developed and corrected is available to the world. All the work of the past weeks is out there, and you are calm and happy. Your story ends at the resolution with adoption success. Users are happy; your team is happy. It’s wonderful. But is it really the end? Maybe not. You have a teaser: wait and see what happens in the coming update.
See? All the elements of a good story. The big problem? Many times, after the climax you have a twist that takes this story to a really dark place: publishing in the stores. Many people face a horror story when it gets to release their apps. And, because I really don’t like stories that go wrong, I’m writing something that is not a story. Just a really cool guide, to assure that you have a happy ending. So, let’s go.
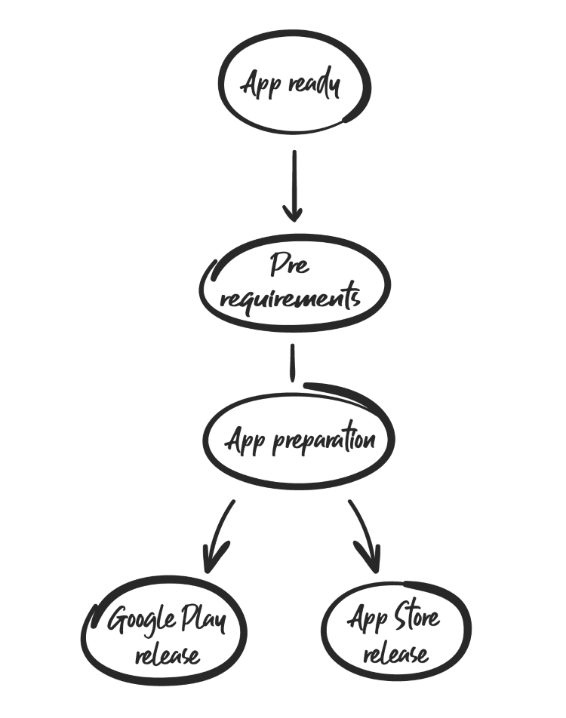
A typical publishing process will follow this process:
Let’s take a look.
Pre-Requirements
When you finally have your application ready, it’s time to publish. But, unfortunately, in this case, it’s not a one-click publish. Here are some pre-requirements to keep in mind.
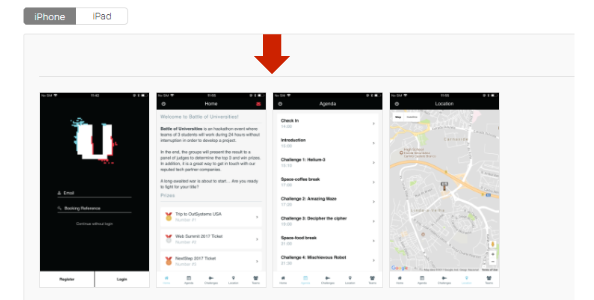
Splash Screen
Each application can have up to five screenshots and three previews, and you must provide at least one. If you are developing a universal app, you need to provide separate screenshots for each device.
Metadata
Before you submit your application, it is a good idea to have your application's metadata at hand. This includes:
- Your application's name
- The version number
- The primary (and an optional secondary) category
- A concise description
- Keywords
- A support URL
If you are submitting an update, then you can also provide some information in the What's New in this Version section.
Product Details
The product details are the app name and a short and full description.
Android-Specific Pre-Requirements
The pre-requirements for Android include graphics assets and the app package. For the assets, you need:
- A set of screenshots (min of 2 and max of 8)
- Application icon (512x512)
- Feature Graphic (1024x500)
For the package, you need:
- APK file signed in release mode
- A keystore file. (How do you generate this? Learn how to generate a keystore file here.)
iOS-Specific Pre-requirements
iOS also has graphics assets and app package requirements. For the graphics assets, you need:
- Graphic assets (set of screenshots (1242 x 2208)
- Application icon (1024 x1024)
For the app package, you need an IPA file signed with the App Store build type.
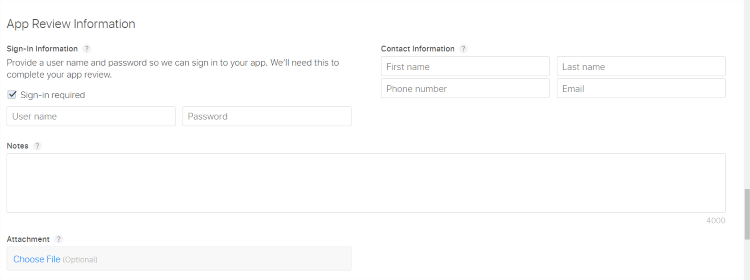
In addition, if the application requires users to sign in, you must provide Apple with a test or demo account to make sure that the review team can immediately sign in and use your application without the need to sign up for an account. You also must understand how the certificates work. It’s quite a fiddly subject, but you can find valuable information here and more information here. Read it carefully and make sure you have everything in place.
Ensure you meet these pre-requirements, and you are a step closer to a happy ending.
Application Preparation
You need to prepare your application for publishing. What does this mean? It means that you have to ensure that your application meets some rules required by the stores. Let’s take a look at them.
Preparing for Google Play
To publish in Google Play, you need to ensure that your application follows the rules for:
- Impersonation and Intellectual Property
- Confidentiality
- Misleading Metadata
- Inappropriate Content
- Monetization and Ads
Preparing for App Store
To publish in App Store, you need to ensure that your application follows the rules for:
- Performance/App Completeness
- Design
- Standard User Interface
- Privacy
- Payments
To help you with this, we have created a really handy checklist with all relevant parameters for both stores. Check all the boxes, and you will be good to go. It’s time to publish in the stores.
Publishing in Google Play
To publish in the Google Play store, follow these steps:
1. Open Google Play Console.

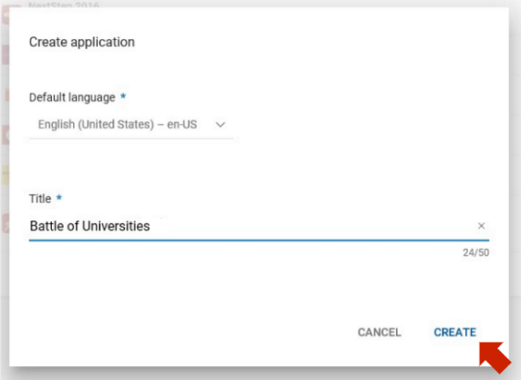
2. Create the new application by providing its Default Language and Name.
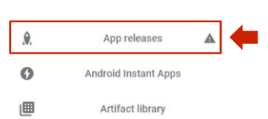
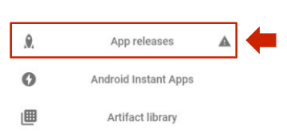
3. In the menu that appears, go to App Releases:
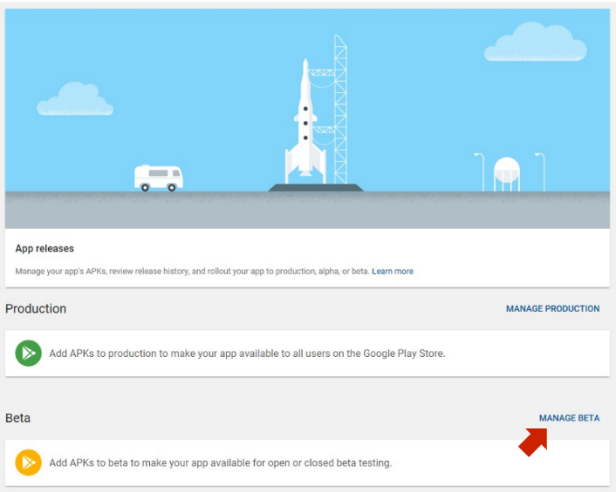
a. In App Releases, select Manage Beta. I recommend using Manage Beta instead of Production because it enables you to do some beta testing (f you want), further ensuring the quality of your app.
b. Check the review summary and Rollout to Beta.
4. Back in the menu, you now need to take care of Content Rating:
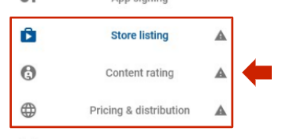
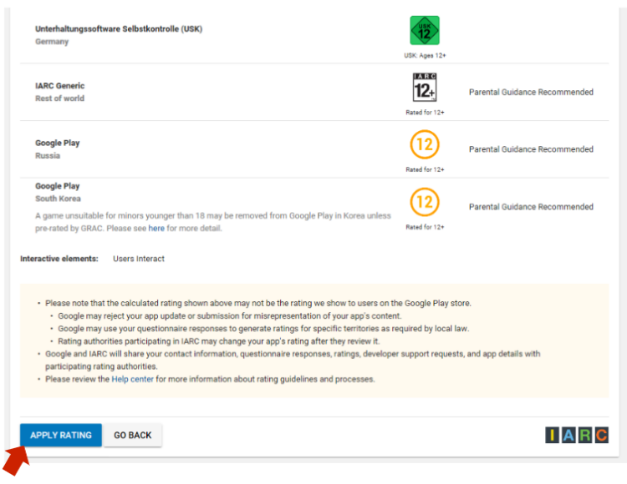
a. In Content Rating, fill out the questionnaire.
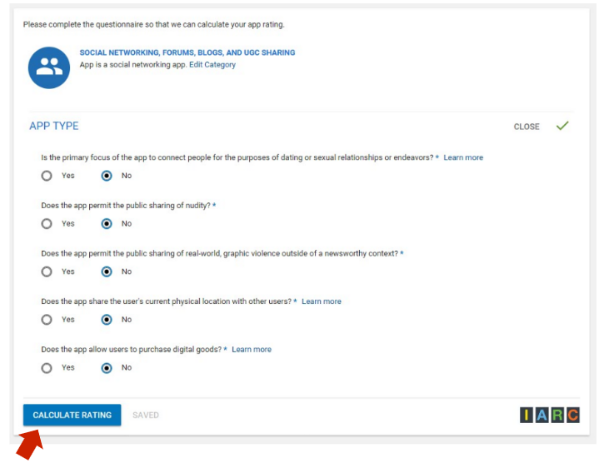
b. Calculate your rating and Apply Rating to your app.
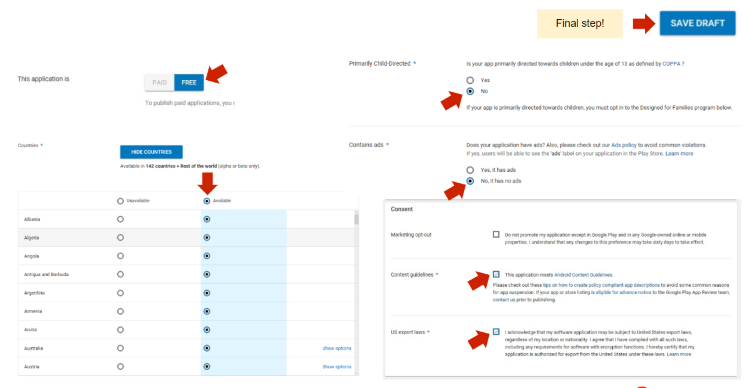
5. Now, it’s time to take care of Pricing and Distribution in the menu. This is where you indicate:
a. If your app is paid or free
b. The countries and regions where it’s going to be available
c. If it’s an app for children.
d. If it contains ads or not.
e. All other required agreements. Then, Save Draft.
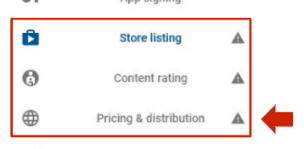
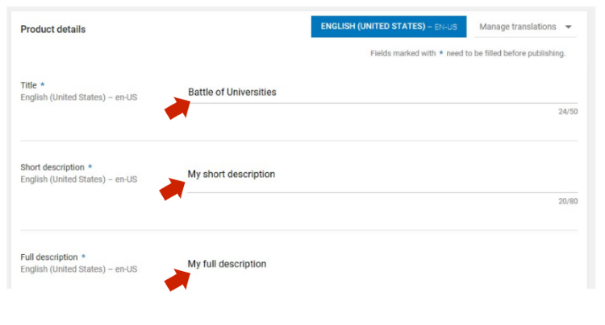
6. Store Listing in the menu is next:
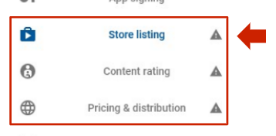
a. Insert the title, short description, and full description.
b. Select the app screenshots that will be visible in the store.

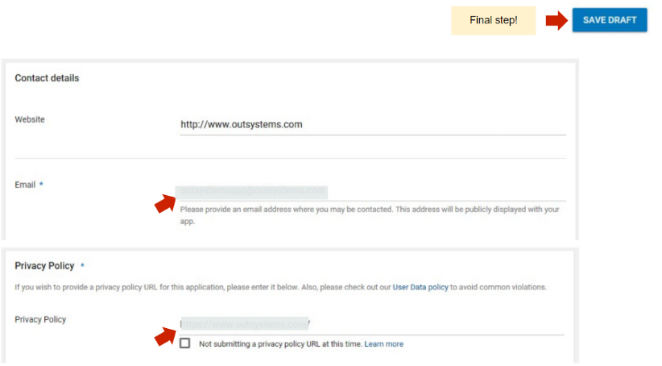
c. Indicate the contact details and privacy policy. Then Save Draft.
As you can see in the menu, you are now ready to roll-out.
7. Go back to App Releases and Start Rollout to Beta.
a. If you want to beta test the app, you can decide the method you are going to use.
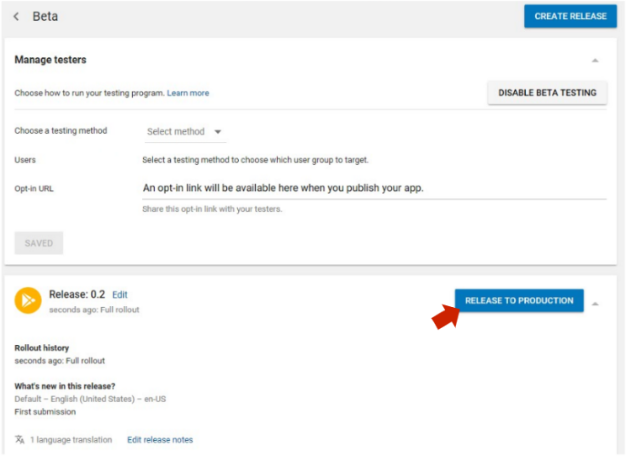
b. If not, Release to Production.
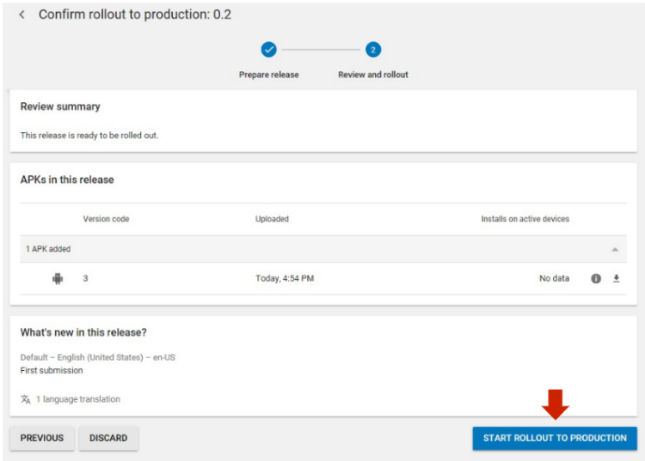
8. Confirm the version, APK, and so on, and Start Rollout to Production.
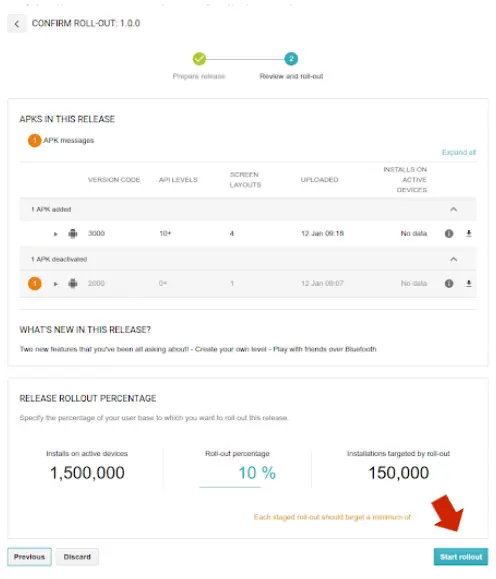
9. To finish your publishing, you just need to Start Rollout.
Publishing in App Store
To publish in the App Store, follow these steps:
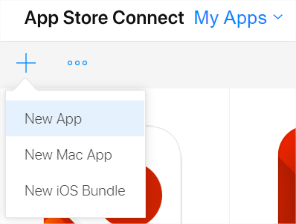
1. Open iTunes Connect and click + to create a new app.
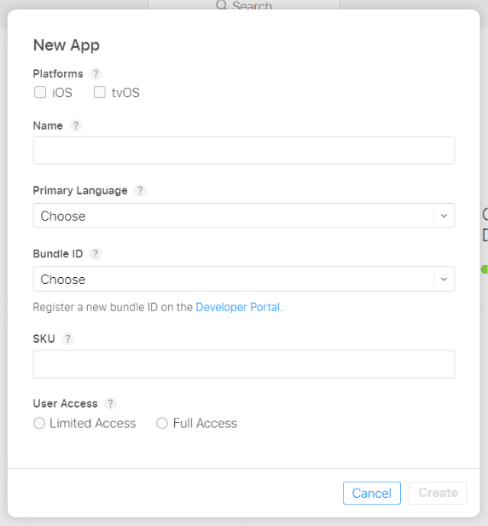
2. Create the new application by indicating its Platform, Name, Default Language, Package ID, and SKU.
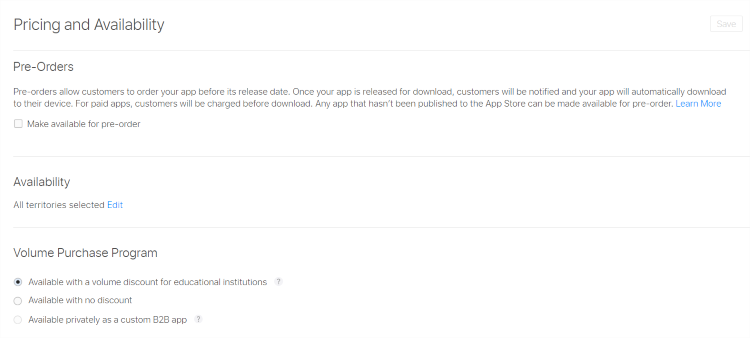
3. In the menu, go to Pricing and Availability and indicate:
a. If your app is paid or free.
b. The territories where it’s going to be available.
c. All other required fields. Then Save.
4. Back in the menu, go to App Information:
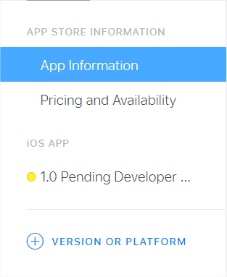
a. Fill-in all app information and Save.
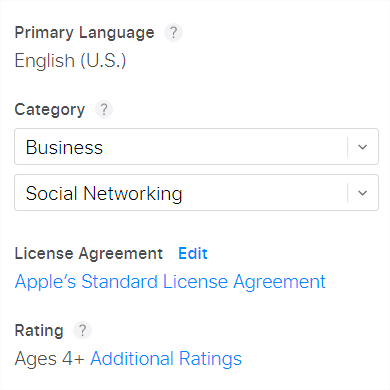
5. It’s now time to prepare for publishing:
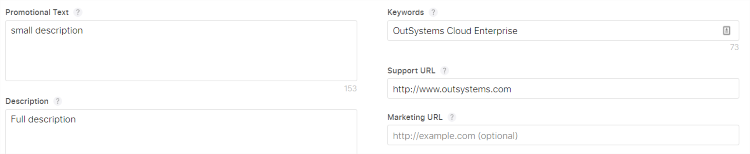
a. Select the app screenshots that will be visible in the store.
b. Enter your information in the Promotional Text, Description, Keywords, Support URL, Marketing URL, and Copyright information fields.
c. Insert the app icon, the app version, classification, the account if your app requires sign in, contact information, and the version launch information. Then click Save.
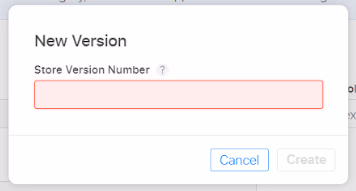
d. Add the Store Version Number and then click Create.
To finish this process, you now need to go back to your environment and use an application loader to upload your app. I recommend the Application Loader, and if it’s your first time, read this to learn how to proceed.
5. In the application loader, send your package to the App Store, then go back to the App store.
6. In the App Store, select a compilation (sometimes it takes up to one hour to show in the list), and click Send to Revision.
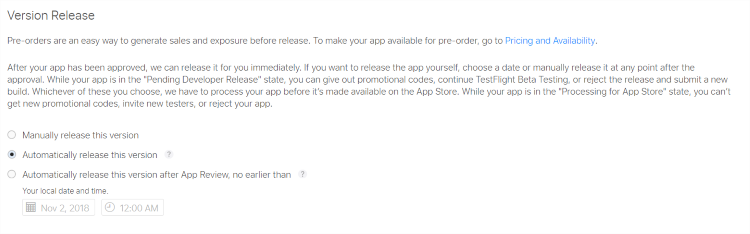
7. Go back to your app details and select the way you want to release the app after revision and click Save.
Happy Endings
Like I’ve said, I like really good stories, but, contrary to what many people think, I believe that a good story can end well. I hope that this guide helps you avoid a horror story with your App’s publishing and your project lives happily ever after.
Author’s note: The steps described in this guide can be changed without notice by the Stores’ owners.