You’ve just connected your app built with OutSystems low-code platform to an API and now you’re wondering, “How can I handle the HTTP status code of this awesome REST web service?”
Don’t worry, you’re not alone. We get that question from a lot of developers. A great place to start for more context is the OutSystems documentation about handling REST errors. If you’re looking for more details on how to handle HTTP status codes when consuming an API, you’re in the right place.

Table of contents:
- Approach #1: Default Behavior
- Approach #2: Handling the Exceptions
- Approach #3: Silencing the Exceptions
- Playing with the Example
- Get the Component
So, let’s go back to what brought you here today. There are three approaches you can take to handle HTTP status codes when consuming a REST web service in OutSystems.
Approach #1: Default Behavior
In OutSystems, whenever the status code is outside of the 2xx range (Success), the platform automatically raises an “exception.”
When you call the API method, you can trap the “exception” with an "AllExceptions" handler or let it bubble up to the generic “exception” handler. Here’s how it looks:
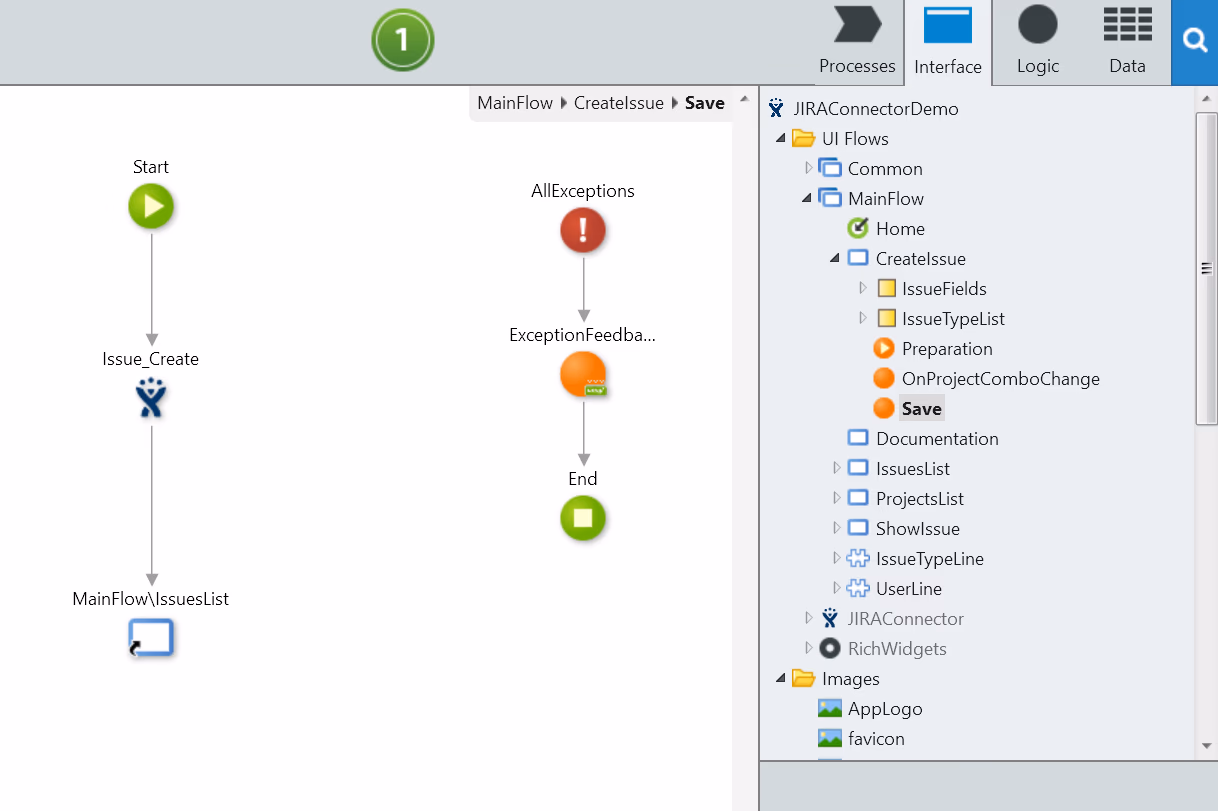
As for the end result, it looks something like this.
This approach, however, has two downsides:
- It doesn't have any granularity on the type of exception.
- It loses any details that the API may be passing to help the developer process the error.
An example would be: while consuming a REST service protected by OAuth, getting a 401 Unauthorized when a token is expired would allow you to refresh the token and execute the request again.
Approach #2: Handling the Exceptions
This approach includes getting the error details and generating REST exceptions.
Getting the Error Details from the REST
I've seen developers "forget" to include the error response from the consumed REST API in the OutSystems response. For example, in this Google Calendar API, the developer didn’t include the error structure.

This happens quite a lot because most REST API documentation has the error handling as a separate topic. Take a look at the following example. The GetEvent response documentation doesn’t include the errors.

However, you'll find the errors in the documentation about handling API errors:

But nothing is stopping us from including the error structure available in the documentation into the response example in OutSystems. Here’s what I mean:

By adding the error structure, we will create an extra structure for the REST API that will still be able to parse the response if there’s an error, allowing the developer to handle it more granularly.
Generating REST Exceptions
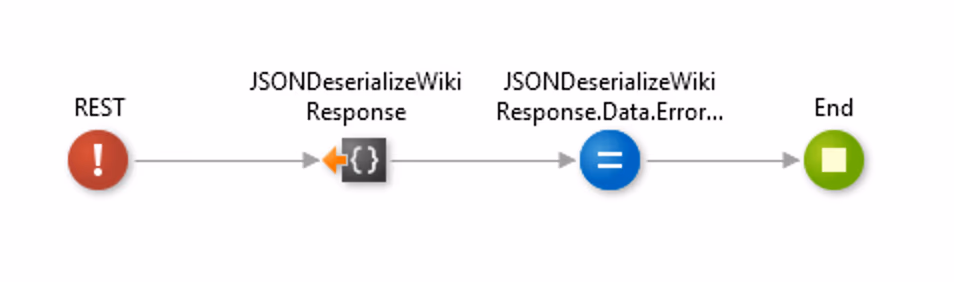
Now, the developer can inspect the HTTP status code in "OnAfterResponse" and decide what to do with it. Some developers choose to raise specific exceptions for each type of code:

Others create a generic REST exception that they can introspect for details.

Here, the developer chose to pass the response text into the “exception message”. This will allow him to:
- Deserialize the “exception message” into the REST API error structure created on the previous step
- Introspect the error
- Act accordingly.
Approach #3: Silencing the Exceptions
This final option is not what we’d call “a good practice.” But in some cases, the REST API returns HTTP code 200 Success even if reporting an error in the details.
If you want, you can convert any REST API to always return an HTTP 200. However, you need to be aware that introspecting the error structure from the API is a must to check for errors. This is why this third approach is considered a bad practice.
However, you can do it by changing the status code in the "OnAfterResponse":
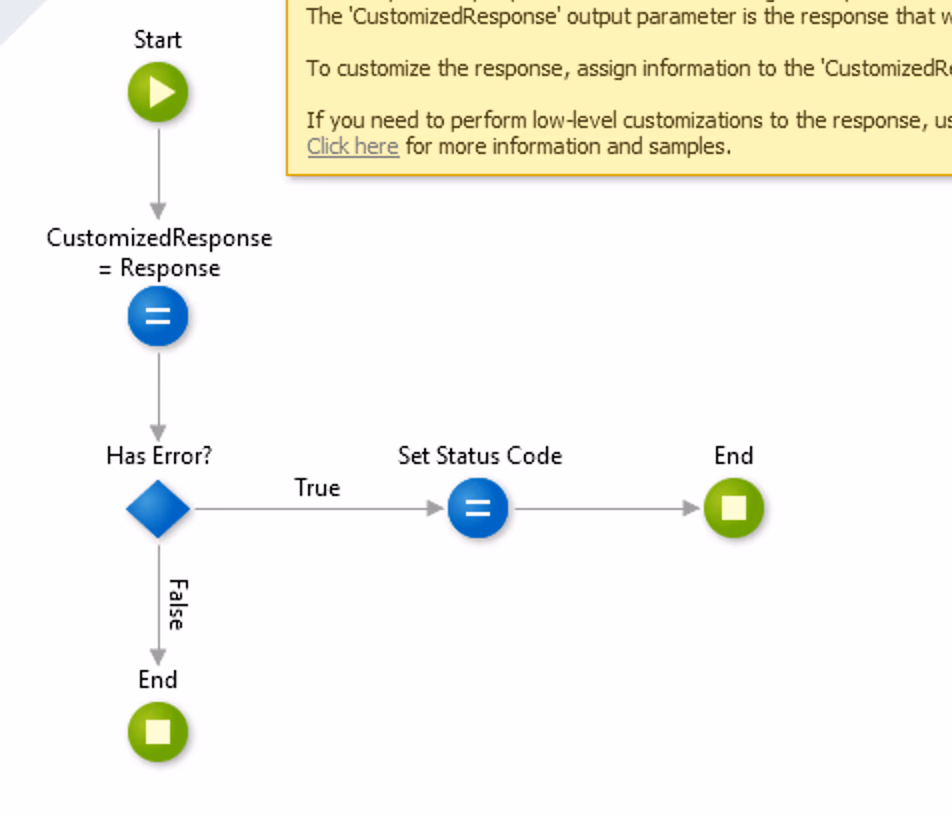
But keep in mind: use this approach at your own risk.
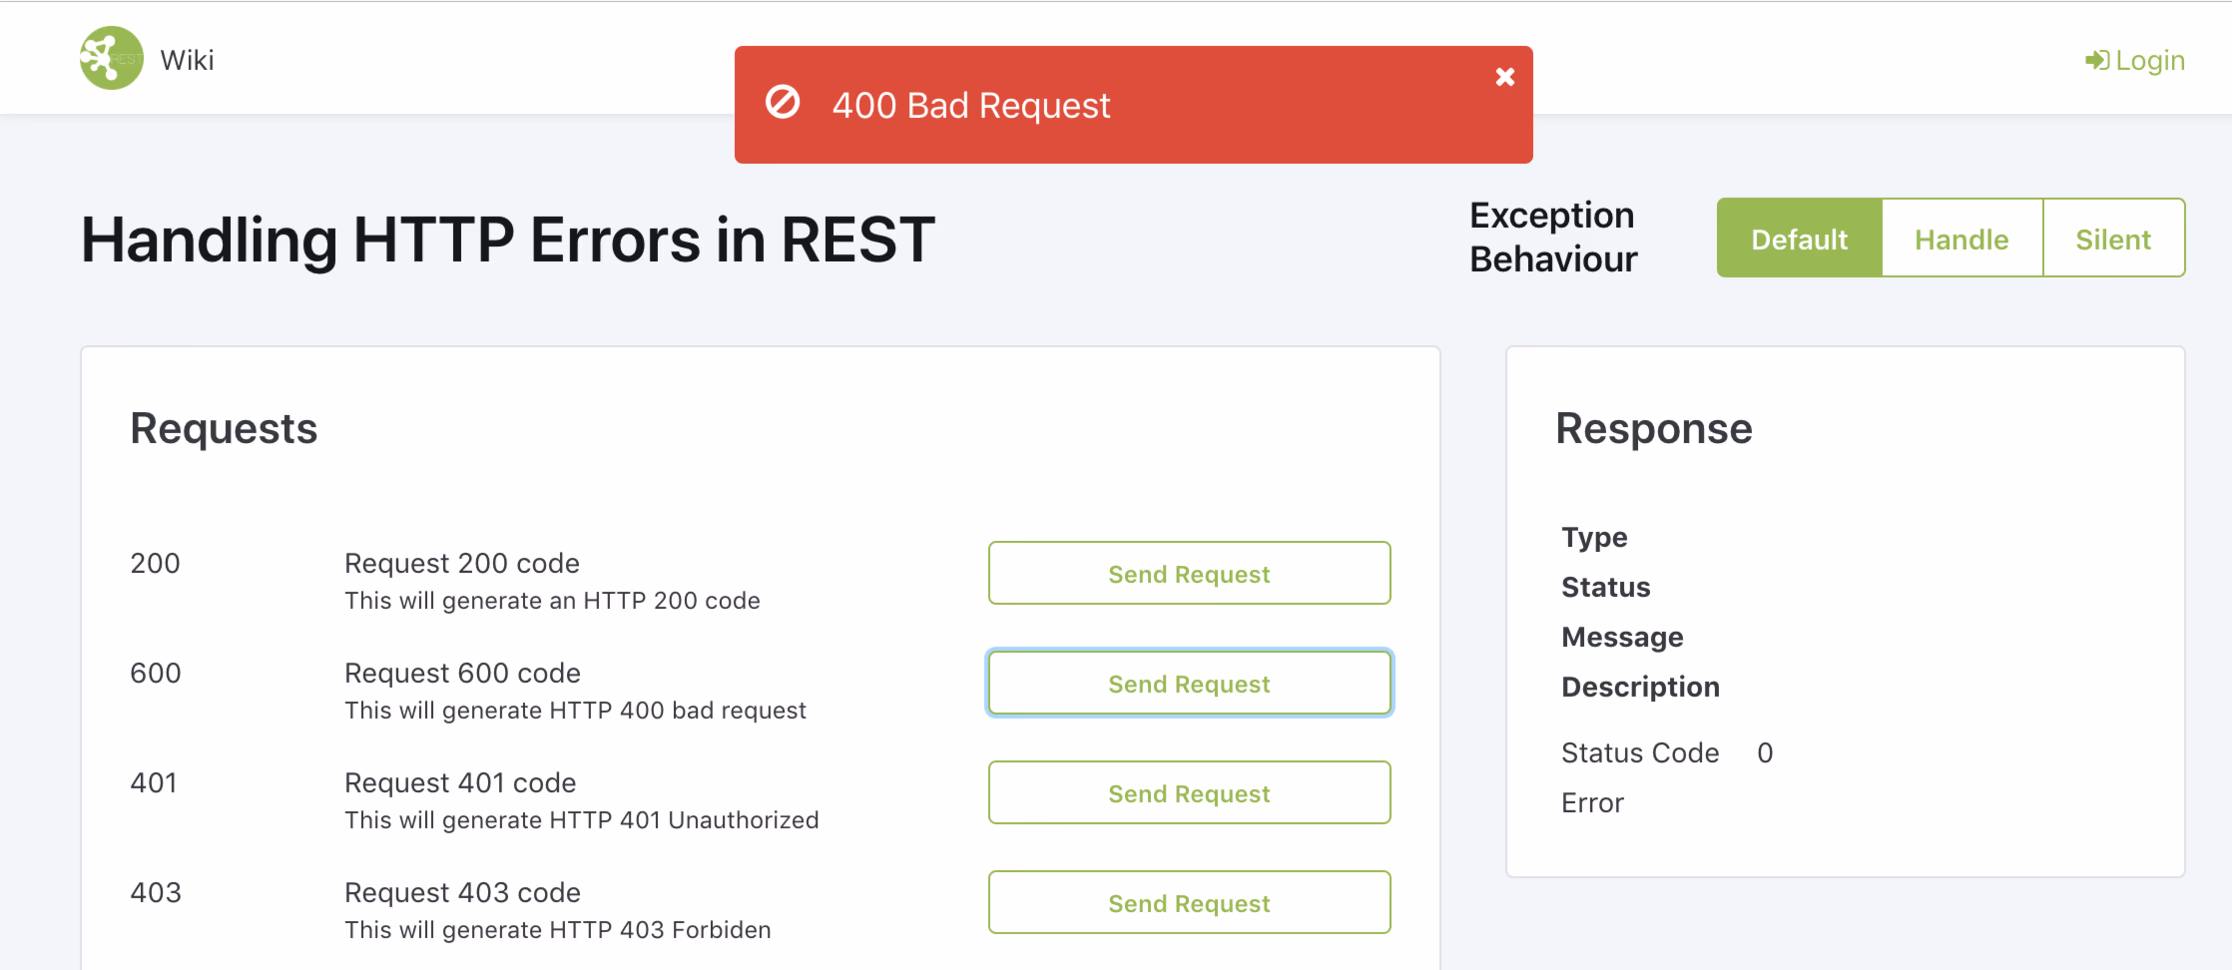
Playing with the Example
In this example, you can choose the three options we discussed.

And then test the API using the buttons.

Get the Component
I’ve published the component in the OutSystems Forge. Give it a try, and go consume those APIs.