This article was co-authored by João Leitão and João Barata.
Authentication is a must in today's IT requirements to ensure proper safeguards when accessing any internal or external web or mobile application. It acts as the first level of defense to restrict access to valuable data to only end-users approved by an organization.

Table of contents:
For the past years, authentication has been consistently presented in both OWASP Top 10 and OWASP Mobile Top 10 as one of the most critical security risks to web and mobile applications.
Phishing and brute force strategies are among the most common attacks that use weak passwords and insecure authentication methods to access sensitive data that can seriously damage organizations’ reputation and/or lead to substantial fines.
The growing importance of secure and robust authentication methods combined with the exponential growth of cloud applications to serve customers, partners, and employees has resulted in a substantial increase of identity providers (AzureAD, Okta, Amazon Cognito, Google, Facebook) that support different authentication protocols (SAML, OpenID).
They all provide built-in features that are highly recommended, such as multi-factor authentication through SMS, token/code or biometric data, minimum complexity requirements for passwords (use of uppercase, symbols, etc.), and password rotation to help organizations harden the security of their applications.
These features and requirements are no longer nice to have; they are a must in every digital solution. We see and use them daily in all types of public-facing web and mobile applications as customers and also in internal applications as employees.
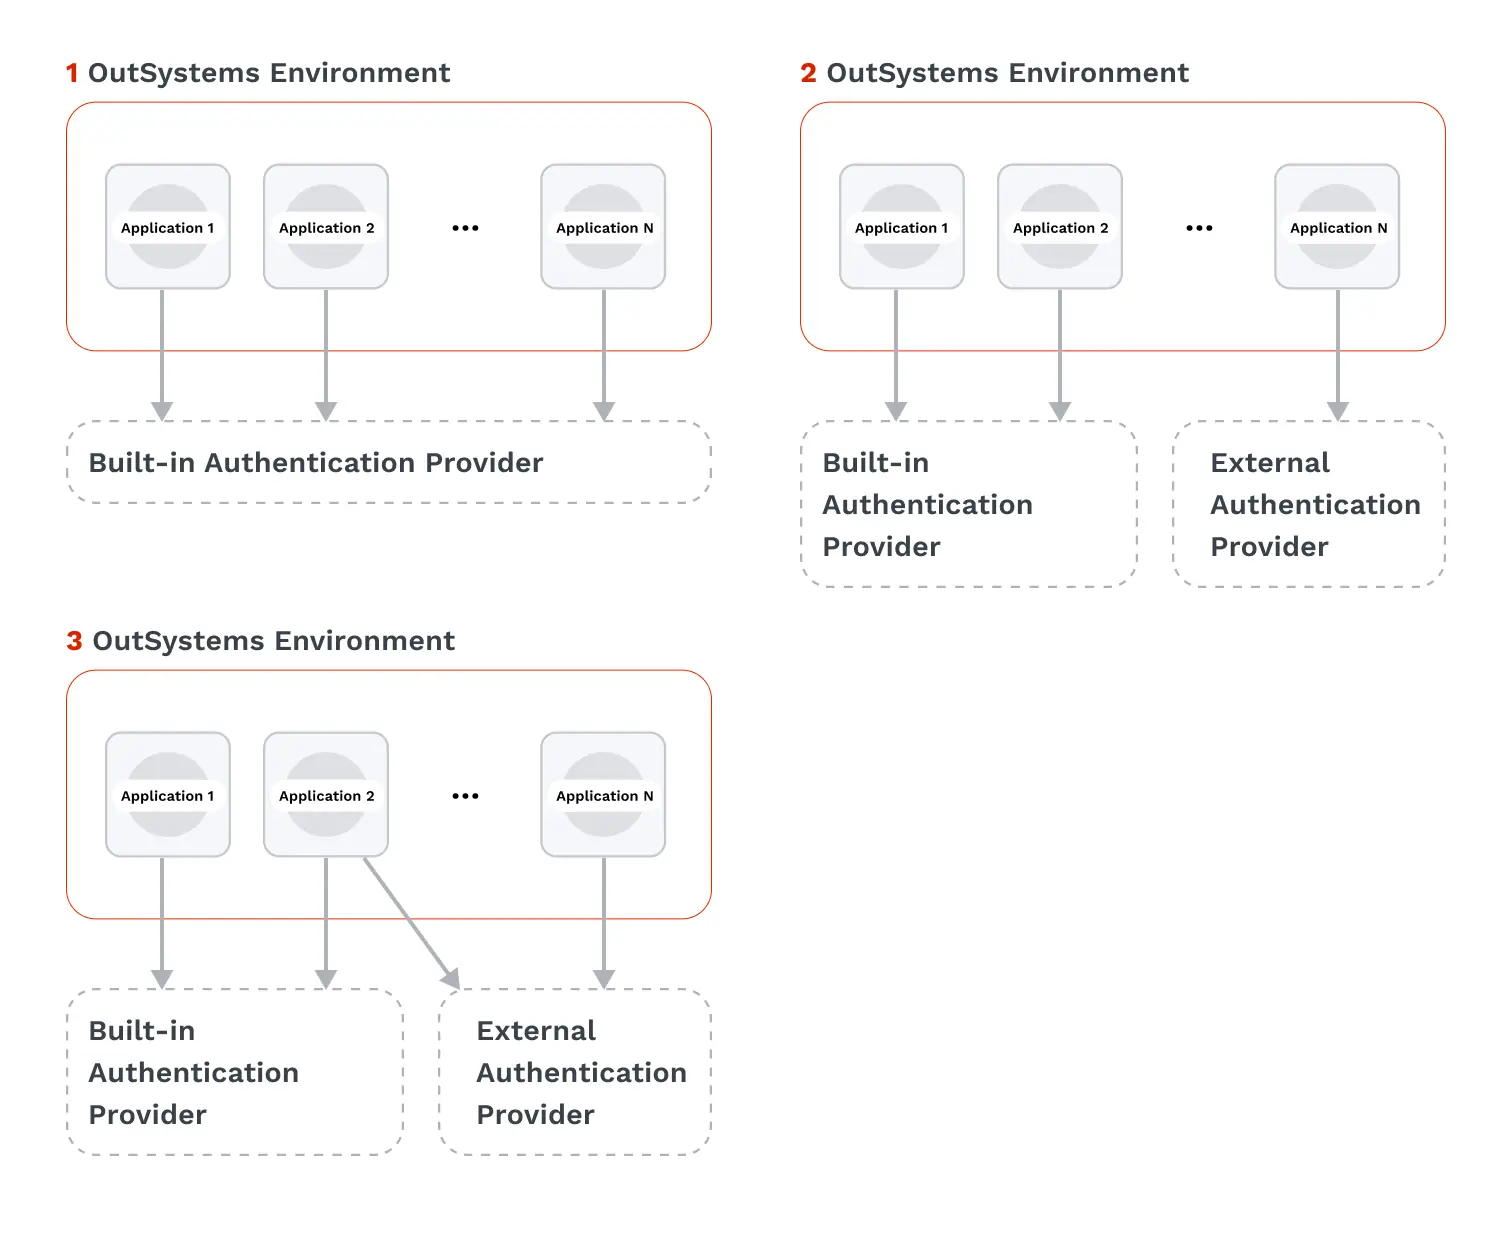
Over time, with the increase of identity providers and mobile and web applications, organizations’ requirements and needs have changed and expanded.
From (1) having only one authentication provider for all applications, passing through (2) multiple authentication providers for different application types (internal vs external for example), all the way to using (3) different providers in the same application (SaaS solutions for example) to cope with end-users expectations while delivering a smooth and secure experience.
The following diagram shows the three examples.
The question you might be asking right now is:
Is it possible to meet all these requirements in my applications using OutSystems? Can I do it in a fast and visual way?
Spoiler Alert: Yes, you can! Want to know more? Keep reading to find out how.
3 Authentication alternatives for your OutSystems applications
Let’s explore how to implement the three alternatives mentioned above in your apps built with the OutSystems low-code platform.
1. One authentication provider for all applications
The OutSystems platform offers six out-of-the-box distinct authentication methods for end-users:
- Internal
- Active Directory
- LDAP
- SAML 2.0
- Azure AD
- Okta.
Through a set of configuration steps, you can integrate with a provider of your choice in minutes.
Take a look at this article to get more information.
In this scenario, all your applications will use the same authentication provider and protocol in an OutSystems environment. Even though this approach allows you to use your own identity provider, it may not be enough for advanced requirements where different identity providers are needed to comply with distinct applications’ requirements in the same environment.
Thanks to OutSystems' extensibility capabilities, you can complement the built-in authentication mechanisms provided by the OutSystems platform with additional providers in the same environment.
2. Different authentication providers in different applications
Taking advantage of OutSystems' full-stack visual development environment, you can customize and adjust your applications’ login and logout flows to integrate your apps with your own authentication providers and be compliant with your requirements.
And you don’t need to start from scratch.
In OutSystems Forge, the repository of reusable and open code components, you can find and leverage pre-built components like IdP / IdP Mobile and OIDC Client that use the two most common authentication protocols, SAML 2.0 and OpenID, respectively, to integrate with your identity providers.
This being said, once you complete the configuration with one of the six platform’s built-in authentication methods, which is applied to all applications in an environment, you can use one of the aforementioned Forge components to adjust and customize the logic of the applications that require a different identity provider than the one applied to the entire environment.
Let's imagine I configure Azure AD as the authentication provider for all my applications using OutSystems platform built-in capabilities. This is great as this is the provider we use internally in our organization. However, my company is about to launch a modern B2B web application that needs to comply with different requirements and authenticate users against Okta.
Following this example, this is what you need to do:
For the new B2B web app, you can use OutSystems Development Environment and follow the detailed steps described in this article according to the component you will use, either IdP or OIDC Client.
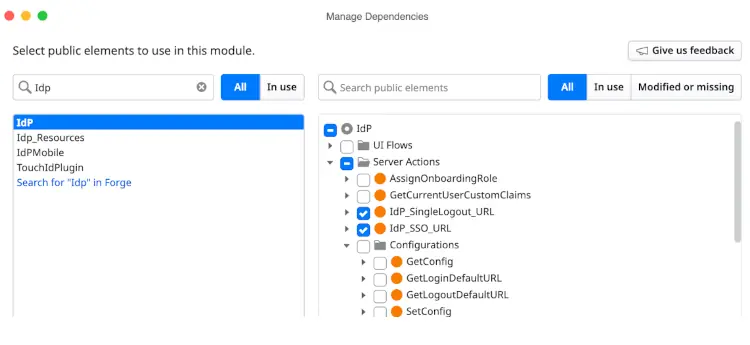
Please consider that in the section “Add dependencies'', you should select the corresponding component instead of Users (step 3). Therefore, in step 4 (when adding dependencies), you must select the appropriate login and logout actions instead of the server actions from Users:
IdP component:
- For Login: IdP_SSO_URL instead of User_GetUnifiedLoginUrl.
- For Logout: IdP_SingleLogout_URL instead of User_GetUnifiedLogoutUrl.
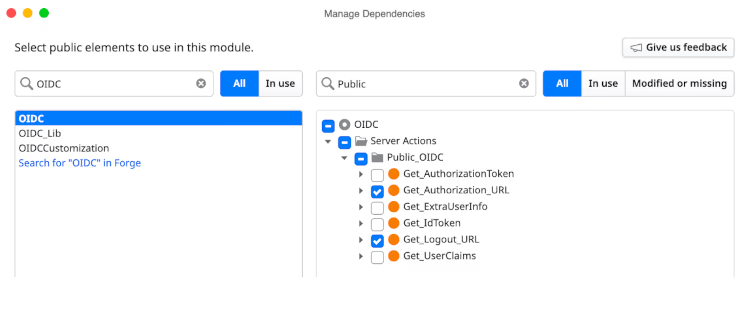
OIDC Client component:
Additionally, when using SAML via IdP component for mobile apps, you should use the SamlLogin and SamlLogout web blocks from the IdPMobile component. In the OutSystems Forge, you can find and use a sample mobile app, IdP Mobile Sample, as an example of using the IdP Mobile component in your mobile apps.
Seems simple, right? Well, that's because it is!
This way, you can have different authentication providers in different applications within the same OutSystems environment. Remember that this is just a possible implementation; you can always customize and extend the pre-built components or even create your own from scratch to fulfill your authentication requirements.
3. Multiple authentication providers in the same application
Now, suppose you want different authentication providers in the same application, which is quite common today in SaaS solutions. You can also use the aforementioned pre-built components and respective server actions in that case.
Going back to our example, after successfully launching the new B2B web application with Okta, my company wants to extend it to more users that need to authenticate with a custom identity provider. Our B2B web application requires two authentication providers: Okta and a custom identity provider, depending on the end user login.
To implement this scenario, this is what you need to do to add a second authentication provider:
You should use IdP or OIDC Client actions, as mentioned before, but for this case, in the Login screen logic, under UI Flows>Common, you need to adapt the UI according to the experience you would like to give to your end-users.
One of the most common scenarios is having different buttons or links to allow users to select their preferred authentication option, like Zoom. The following images show Zoom’s login screen and a simple example with an OutSystems application.
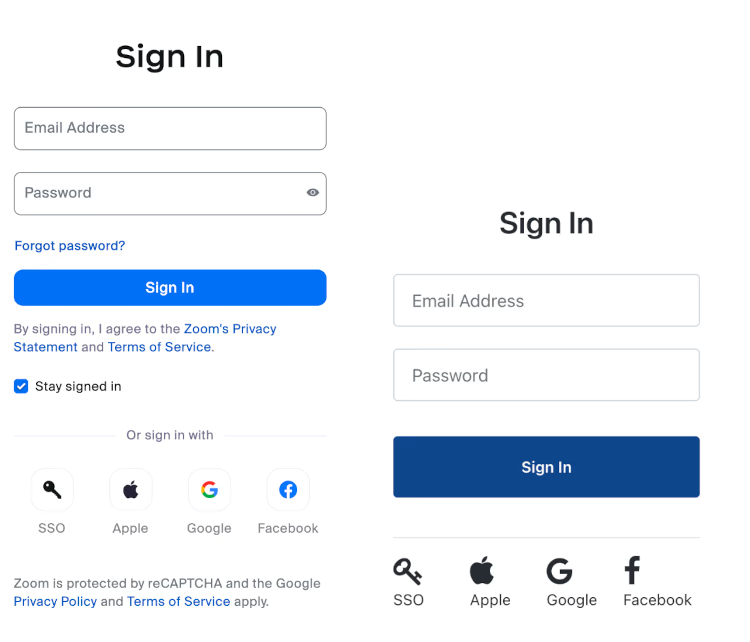
Both screens look similar, right? It shows the power of the OutSystems platform in creating a unique and fully customizable user experience in a visual approach without any limitations. To know more about our UI/UX capabilities, take a look at this article.
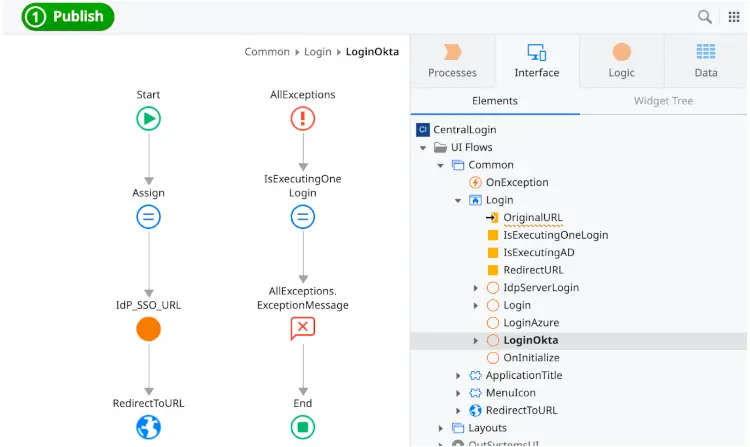
Going back to our authentication example, for each button or link in the Login screen, you should add to its logic the required component’s login action to integrate with the corresponding identity provider. As seen in the image below for the ‘Login Okta' button’s client action, we are invoking the IdP_SSO_URL server action from the IdP component to integrate via SAML with Okta.
For the remaining buttons, the logic to follow in each client action is the same depending on the protocol, OpenID or SAML, and the respective component, OIDC or IdP.
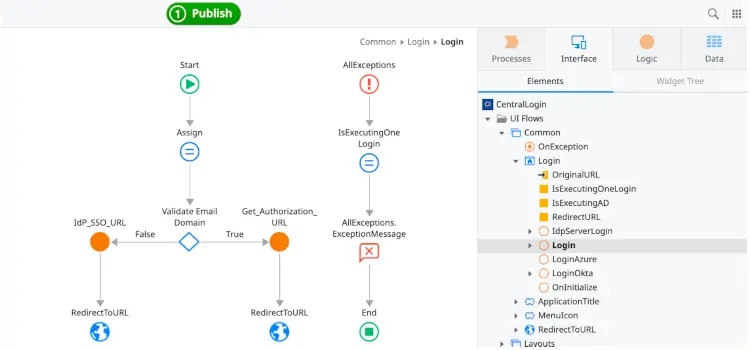
Alternatively, you can abstract the authentication mechanism used by the end users and automatically redirect each user to the required identity provider based on a logical condition(s), like the username, email domain (internal or external), source request, or other.
In the image below, we’re using the user's email domain to identify the correct authentication provider and, consequently, use the corresponding server action to allow the user to authenticate successfully.
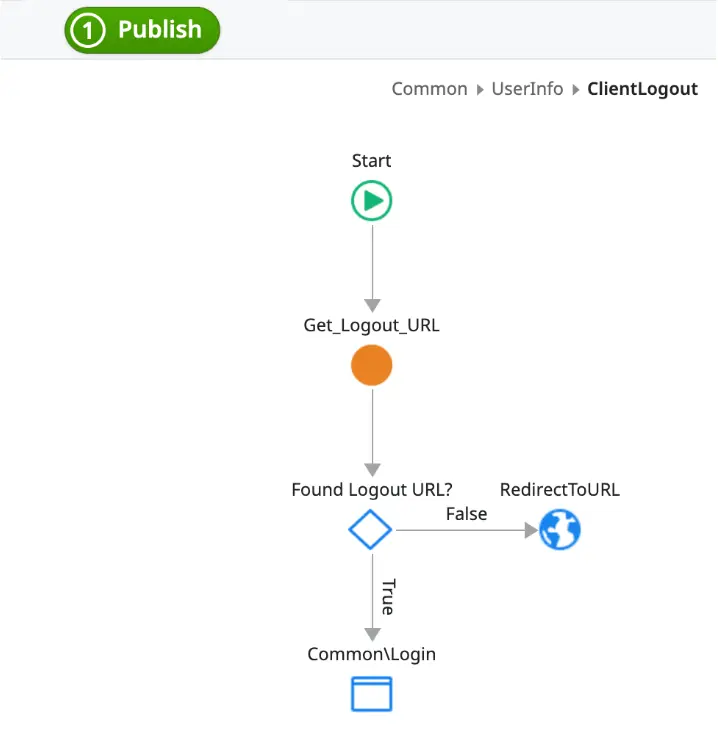
As for the logout, you should change the client action ClientLogout, under UserInfo web block in the same way as it is referred to in the previous section, (2) different authentication providers in different apps.
The image below shows an example using the Get_Logout_URL from the OIDC component.
If you’re curious about this topic and would like to explore how to implement different authentication strategies visually in a high-performance low-code platform, I encourage you to try the OutSystems development environment by signing up for our free edition.