If you’re an OutSystems user, you’re probably familiar with the platform’s integration and extensibility capabilities.
You can connect your applications with external APIs, databases, cloud services, and you can also authenticate your end-users thru external authentication methods as well.
Table of contents:
- A few important notes before we get started
- Setting up Amazon Cognito
- Setting up AWS Cognito in OutSystems
- Implementing Cognito Authenticator in your OutSystems app
- Ready to integrate AWS Cognito in OutSystems?
For several of the most popular authentication providers, OutSystems offers out-of-the-box integrations, allowing you to set them up in just a few clicks, such as Azure AD (or ADB2C), Okta, SAML 2.0, and Active Directory, to name a few.
These pre-built structures speed up the process, but you’re not limited to them. You can find additional connectors to authentication providers in the Forge, OutSystems repository of pre-built and reusable components.
This way, organizations can configure OutSystems authentication mechanisms to work with their preferred enterprise authentication platform.
Recently, we’ve been asked quite often about AWS Cognito. So, I decided to make our users' lives easier and show them how to implement this external authentication in OutSystems applications. You'll be able to do it in just about five minutes of reading plus fifteen minutes of implementation.
That’s what we call “speed” around here.
A few important notes before we get started
In this article, I’ll show you how to integrate Cognito and OutSystems. You’ll need an OutSystems and a Cognito account. Note that there are some steps, mainly from Cognito side, that are quite important because once saved, you cannot change them.
I’ll also use Forge components that were developed by our developer community to speed up development.
Once the configuration from both sides is done, I’ll show a quick customization you need to implement on your application to close the loop.
Setting up Amazon Cognito
Amazon Cognito, or AWS Cognito, is the Amazon IdP (Identity Provider) solution.
It provides user authentication, authorization, user management, access control, synchronization, and analytics capabilities for web and mobile applications, all in a centralized tool.
You can try it for free, but you need an AWS account.
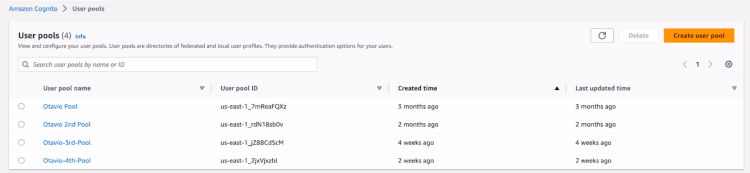
Assuming you already have an AWS account in the management console, search for Cognito and navigate to the Cognito landing page.
On this page, you’ll see the list of pools you have (if any) and where you can create new ones.
Creating a pool
Creating a pool is a six-step process.
It’s quite straightforward, but there’s some information that you need to configure correctly because, once the pool is created, you cannot change it. Fear not; AWS will pop a message letting you know the fields that cannot be changed afterward.
Here, I’ll summarize the most important and trickier steps to help you out:
- Step 1: Configure Sign-in Experience >> Provider Types >> Select “Cognito User Pool”.
- Step 2: MFA Enforcement >> No MFA.
- Step 5: Integrate your app:
- Use the Cognito Hosted UI: click check (this will provide a user interface for users to log in).
- Define a domain: it needs to be unique.
- Client Secret: don’t generate a client secret.
- Allowed CallBack URLs: Go to <<[enter your environment].outsystemscloud.com/AWSCognitoUserPoolsConnectorReactiv/CognitoCallBackReactive>>. Once the user is validated in AWS Cognito, you must define what you want Cognito to do next. For this article, I will work with a Forge component that provides some functionalities, including a way to treat the return from AWS.
- Step 6: Review your configuration and hit the “Create user pool” button.
Setting up AWS Cognito in OutSystems
Once we have everything ready from Cognito’s side, it is time to start implementing it from our side.
To help with this task, our community has contributed two components that are available in the Forge:
- AWS Cognito Reactive for reactive web apps.
- AWS Cognito Core core functionalities (used by AWS Cognito Reactive).
Install and publish both components on your infrastructure, open the Applications screen from AWS Cognito User Pools Connector Reactive app (<<[enter your environment].outsystemscloud.com/AWSCognitoUserPoolsConnectorReactiv/Applications>>) and click on Add application button.
You will need to fill it in with information about the pool you have just created on AWS. It will look something like this:
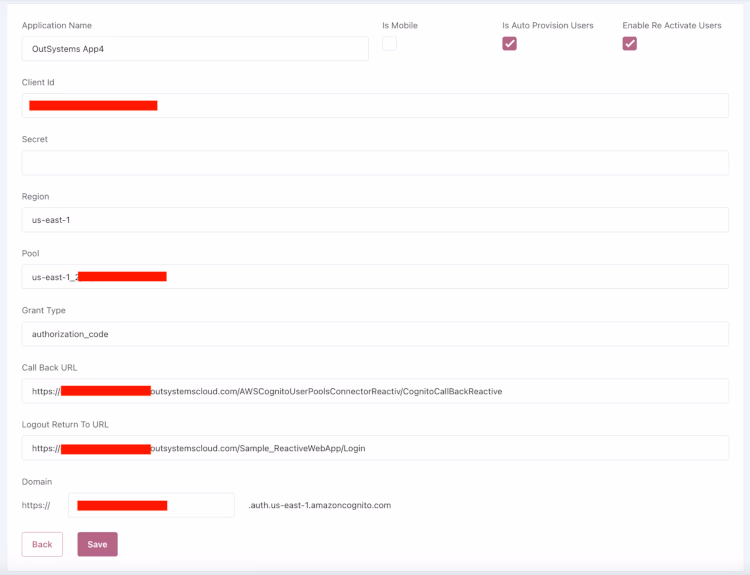
Save it.
Implementing Cognito Authenticator in your OutSystems app
Once everything is set in the AWS Cognito components, it is time to make a few changes to the app you want the users to log in using Cognito.
In your app, go to AWS Cognito User Pools Connector Core app >> Server Action >> GetLoginURL.
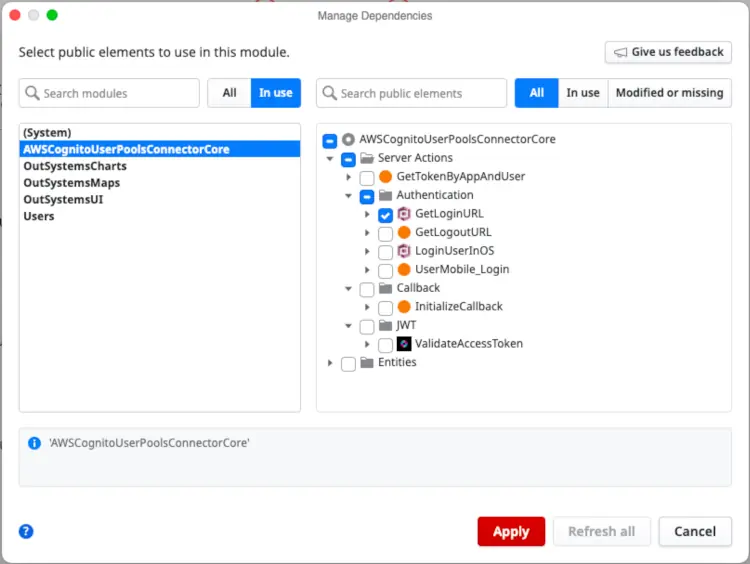
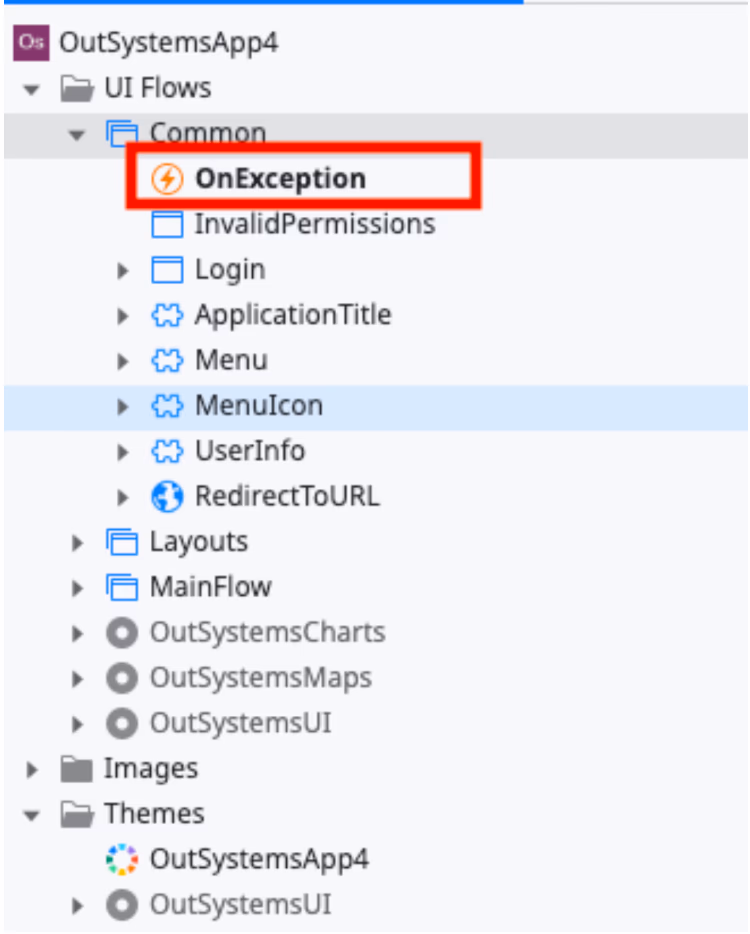
Then, change your Common >> OnException Action.
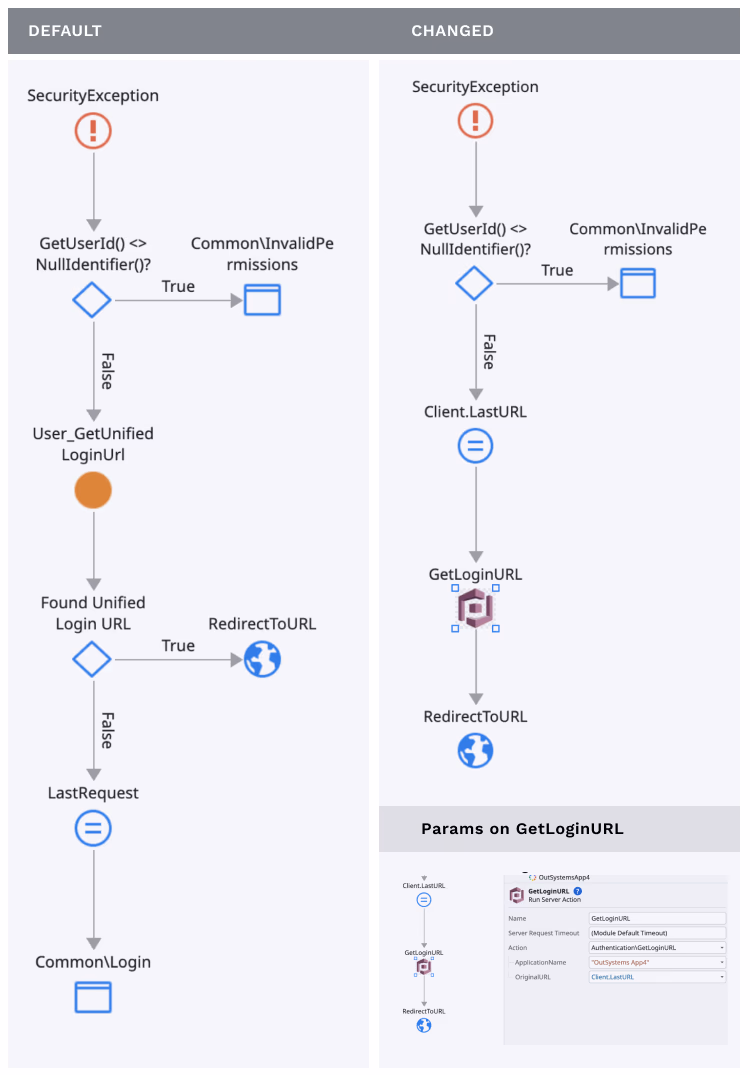
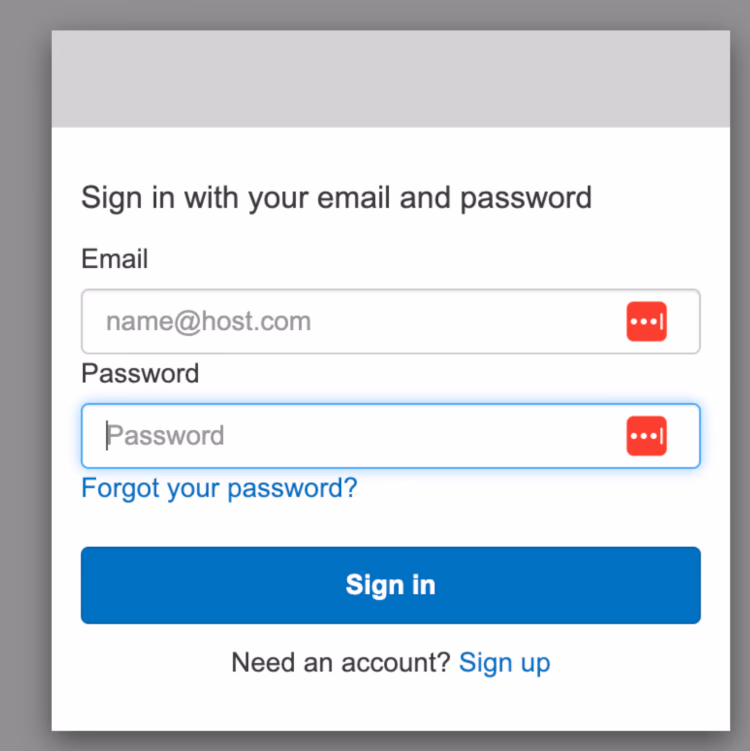
With this change, whenever an unauthenticated user tries to access your app, they will be directed to Amazon Cognito UI.
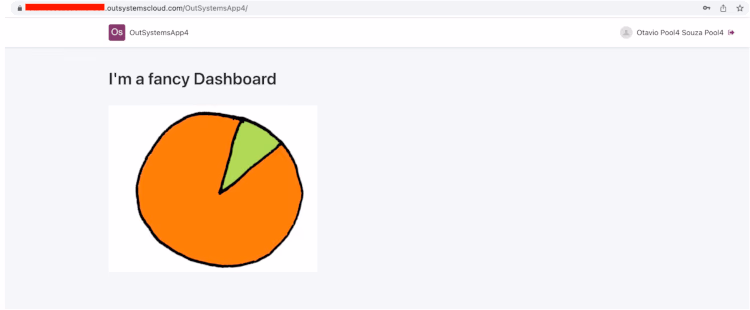
And after a successful login, they’ll be redirected to your application.
Ready to integrate AWS Cognito in OutSystems?
As you can see, a few steps are involved in this configuration, but you can complete it in minutes.
A special thanks to Marcelo Ferreira — OutSystems MVP — for dedicating time and effort to create those two components and making our lives much easier.
If you have any additional questions, hit us via chat or forum. Our whole community will be glad to help.
Additional references