Pushwoosh: Dealing with Push Notifications in Multiple Environments
Let me start this article with a quick intro to Pushwoosh. Pushwoosh is a service that allows you to send and receive push notifications to devices, abstracting details like the platform the device is running on. You can add it to your OutSystems applications with the Pushwoosh Plugin available on the OutSystems Forge.
To start receiving notifications, you use the plugin to register your device in Pushwoosh. Then Pushwoosh will register the device in the Apple Push Notification Service (APNS) or Firebase Cloud Messaging (FCM), depending on if you're developing for iOS or Android. Once registered, you can get creative and send messages to your users.
For Android, the configuration can be a bit tricky, because you’ll need to have a “google-services.zip” that contains the google-services.json file inside the google-services target directory. But fear not, OutSystems has in-depth documentation on how to add the Pushwoosh plugin to your apps and configure it for iOS and Android. So, that’s not what brought me here today.
I’m writing to answer to probably the most asked question about push notifications after “how to configure push notifications in Android”, that is:
“I have one application that goes from Development to QA and then to Production. How do I sort this out?”
Well, when you deploy the code from environment A to environment B, the resources folder you created when adding the plugin to your OutSystems app, will be deployed too. That said, you have two options:
- Use the same application identifier for the three or more environments (Development, Test and Production, at a minimum)
- Deploy the code and then manually update the file so you can generate the apps correctly.
Does this work? Yes. Is it good enough? Well, not for me.
Managing Pushwoosh Apps Across Environments
There are several ways to manage an app across environments, but I usually just use different identifiers for different environments. Here’s what I mean. For this case, I’ll call my package com.volitionalsoftware.whiteridge, so for each environment, I’ll use:
- Development: com.volitionalsoftware.whiteridge.dev
- Test: com.volitionalsoftware.whiteridge.test
- Production: com.volitionalsoftware.whiteridge
This means I can keep the three environments in my device at the same time — which is useful. And I do the same with Pushwoosh — N different Pushwoosh apps for N different environments. While this doesn’t mean that you need to have N Pushwoosh applications for N environments, I strongly suggest that you have at least the “productive” application and a non-productive application. This way, you have more control over your apps and don’t run the risk of sending unwanted notifications to your users.
If you’re fairly aware of how LifeTime deployments work, you can’t specify versions of resources, neither have them dynamic. So, given that in Android we need to have the correct google-services.zip file in a given directory when the Pushwoosh Plugin is installed, how can we automate this?
Dear Reader, Meet Hooks
OutSystems mobile applications run on top of Cordova, and Cordova has this thing called “hooks”. From their documentation:
"Cordova Hooks represent special scripts which could be added by application and plugin developers or even by your own build system to customize cordova commands.Cordova hooks allow you to perform special activities around cordova commands. For example, you may have a custom tool that checks for code formatting in your javascript file. And, you would like to run this tool before every build. In such a case, you could use a ‘before_build’ hook and instruct the cordova run time to run the custom tool to be invoked before every build."
There are two ways we can run hooks: either put it in the hooks folder of the application or use a plugin. I’ll use the second route—a plugin — and here’s why.
Below you can see the folder structure of a Cordova project with the Android platform added:
├── hooks
├── platforms
│   └── android
│       ├── cordova
│       └── platform_www
├── plugins
├── res
├── www
└── config.xml
As you can see, the hooks folder is at the same level as the www folder. Anything we put in the resources of our OutSystems application and deploy to a given target directory, it will be deployed into www/<target directory>/filename.extension. Thus, using the hooks folder of the application is not attainable.
So let’s go with the plugin route, an empty one. Do you know how to create an empty plugin with everything that is needed for both Android and iOS? No? No worries, I’m here to help you.
Head over to the cordova-plugin-empty by timbotnik and fork it or clone it. If you clone it, make sure you put it into a repository that you control. Note that there are other possibilities of using native plugins in OutSystems but, for this article, we’ll go with the public git repository.
The result in terms of “native” code can be seen here at https://github.com/aportuguesecoder/pushwoosh-google-services-management. I decided to call it Pushwoosh Google Services Management because, well, that’s what we want to do. We will manage the google-services file for the correct environment.
Before we delve into the plugin itself, let’s go over the OutSystems part of this implementation.

The plugin only has a public web block — so we can reference it and make sure the plugin’s code is included in the generated binary — and have the extensibility configurations defined as OutSystems says it should be:

And that’s it for the OutSystems part. That was fast, huh?
Let’s now go to the plugin part. If you checked the link above, you should have seen something like this:

Forget about src, www folders, and the package.json file too. At this moment, we only need the plugin.xml file and the hooks folder. Let’s go into the plugin.xml file first.
As per Cordova’s documentation, the Plugin.xml file defines the structure and settings required for your plugin. It has several elements to provide details about your plugin.
You can take a look in detail of the whole plugin.xml file, but for now, let’s just focus on the (most) relevant part. Below is the excerpt we’ll analyze:
<js-module src="www/GoogleServices.js" name="GoogleServices">
<clobbers target="plugins.GoogleServices" />
</js-module>
<platform name='android'>
<config-file target="res/xml/config.xml" parent="/*">
 <feature name="GoogleServices">
   <param name="android-package" value="com.armandogomes.cordova.plugin.GoogleServices" />
 </feature>
</config-file>
 <source-file src="src/android/GoogleServices.java" target-dir="src/com/armandogomes/cordova/plugin" />
 <hook type="before_plugin_add" src="hooks/before_build_MoveGoogleServices.js" />
</platform>
The js-module entry points to our “code” file that can be used in our OutSystems applications. This needs to match the native files; otherwise, it won’t work. Other than that, it’s just a placeholder.
What we need to see here is the <hook> element under the <platform name=’android'> element. As you might have guessed by now, different hooks can be applied to different platforms. Given we just need to do this for Android, there’s no need to use the same hook for iOS.
Our hook has one very clear goal: make sure we can build our apps. To achieve this, we split the work into three phases:
- Obtain the config.xml file of our application.
- Process the config.xml file and search for the identifier of the application being generated.
- Copy the correct file to the final folder.
So, let’s do it.
Step 1 — Obtain the Config.xml File
// determine appId (read it from config.xml)
var configFile = "config.xml";
var xmlData = fs.readFileSync(configFile).toString('utf8');
If you recall our folder structure shown a while ago, the config.xml file will be at the root directory of the generated Cordova project. It seems the hooks run at the root directory of the project, allowing us to directly invoke the config.xml file instead of trying to figure out the path.
We invoke the fs.readFileSync function from the FileSystem Node module so we can read it synchronously. Why synchronously? Because we want to make sure the rest of the script is executed as intended, so when the rest of the script needs their “drink”, “it will have the drink”! (Aaah, I miss Kimi.)
As for the toString('utf8') function, that’s just to get the output as a readable string.
Step 2 — Identify the Identifier of the Application
We now have the full contents of the config.xml file. If we take a look at Cordova’s documentation, we can see that the root element—widget — has an attribute named id that specifies the reverse-domain identifier. Given that this is what we want — since this uniquely identifies the app that is being built — we’ll do a simple search in the text to retrieve it.
var n = xmlData.search(" id=\"");
if(n > 0) {
 n += 5;
 var count = 0;
 var cont = true;
 while(cont) {
   if(xmlData[n+count] == "\"") {
     cont = false;
   } else {
     count++;
   }
 }
 appId = xmlData.substring(n, n+count);
 console.log("[PUSHWOOSH HELPER] App Identifier detected: " + appId);
}
We know that the attribute is named id, so we search for it. The search function will return the index in the string where the searched text starts. If you look closely, you see that we have a blank space before the id. This is meant to obtain the id-only attribute. If we had a, let’s say, “somethingid=” before the id attribute that we want, that would be the match.
Since we’re searching for “ id=\”” (the backlash is the escape character, so it doesn’t count for character count), we know that the index returned will be the starting point of the blank space. We also know that our search string has a length of five characters, so we can add five to our index (represented by n). Then, doing it in the most efficient and beautiful way — note the irony —, we just iterate the string searching for the next “ character, which means the value of the attribute has ended — we use a while loop for that.
Finally, once the “ is found, we just apply the substring function from n (after the first “, where the identifier starts) to n + count, in which count is the length of the identifier. Oh, and we log what we found — so this shows up on the build log that you can get in Service Center.
Step 3 — Copy the File
function copyGoogleServicesFile() {
 var srcFile = path.join(
   "www/google-services", appId, "google-services.zip");
 console.log("[PUSHWOOSH HELPER] Source file path: " + srcFile);
 if(fs.existsSync(srcFile)) {
   var buildPath = "platforms/android/app/src/main/assets/www/google-services";
   fs.mkdirSync(buildPath, { recursive: true });
   console.log("[PUSHWOOSH HELPER] File exists.");
   fs.createReadStream(srcFile).pipe(
     fs.createWriteStream(path.join(
       buildPath, "google-services.zip")
     )
   );
   console.log("[PUSHWOOSH HELPER] File was copied into " +
     path.join(buildPath, "google-services.zip") + ".");
 }
};
Having our identifiable identifier identified (pun intended) ready, we can move to the final step of the process: copy the proper file from a given source folder into the correct (and final) folder.
A little ELI18 (explain like I’m 18 years old) of what happens when you try to build a Cordova project: in the tree structure shown before, we do have a www folder and a platform_www folder (nested element of platforms/android). When we are preparing the application (one of the steps of the build process — cordova build build is a shortcut for cordova prepare + cordova compile), the contents of the www directory are copied into the platforms/android/platform_www folder.
Summing up, anything you change in the www directory will influence all the platforms. Anything you do in platforms/<platform>/platform_www will only influence that specific platform. Overwrites are expected, so please exercise caution.
When we add a new resource in OutSystems, and we say that it should be deployed to the target directory, it is the same as saying “deploy to www/<target directory>/filename.extension”. So, when compiling, Cordova will copy the file into platforms/android/platform_www/<target directory>/filename.extension.
Back to the code part. The first thing we do is to make sure the file we want exists. We do that by checking if the www/<application identifier>/google-services.json exists. If the file exists, we copy the file into platforms/android/app/src/main/assets/www/google-services.
Why this folder? I tried to copy into platforms/android/platform_www, but apparently, it wasn’t being sent soon enough since the Pushwoosh Plugin could not find the file. Some “print-oriented debugging” later, I found out that folder to do the trick.
Step 4 — Organize Files in Service Studio
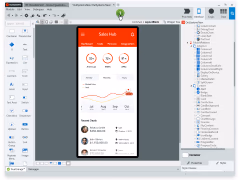
This final step isn’t part of the plugin itself, but we need to do it. Otherwise, what we’ve done just doesn’t make any sense. We need to make sure that our files match the naming convention that we are expecting. As such, a three-environment pipeline would look something like this:

And voilá, our “just-in-time file management” does the trick, and now Pushwoosh builds successfully.
It’s the Final Countdown
The latest version of this plugin was published just a few weeks ago, and, as you might have guessed, it applies to mobile applications only.
I hope you find this article useful and that it’ll save you some headaches. If you run into any issues using it, leave a question in the OutSystems Community Forum, or in the component subforum, so that I (or any other member of the community) can reply to your assistance request.
Use OutSystems Now!
Get your first app built in a few minutes.
It's free forever.