Evaluation Guide

An idea for an app is only as good as your ability to bring it to life. The problem is software development is hard, it takes time (and patience!), and it’s not really over once you hit publish. In this ever-changing world, you need to continually evolve it to meet demands.
The good news is that now there are modern low-code development approaches with embedded tools designed to accelerate app development and automate much of the application lifecycle. Before you start rolling your eyes, hear me out: low-code platforms like OutSystems use visual development, yes, but as a way to wrap up the complexities that you typically face when creating an app or system. You're always in control. You can customize HTML, CSS, and JavaScript on the front-end. And you can use .NET code in your applications. You are never limited in what you can achieve. Plus, you can integrate easily with other applications by consuming REST or SOAP APIs, or use one of thousands of pre-built connectors and components in our open-source Forge repository.
In this article, I’ll show you how you can build an app with a low-code platform: the OutSystems platform. For this demo, I’ll be creating an app that most companies need: an employee onboarding app.
Before we start, sign up for the OutSystems free edition (no credit card info needed), set up your personal environment, and follow this tutorial to see what creating an app in OutSystems really looks like.
Now, without further ado, let’s get started.
Step 1: Create a New Application
There are two routes you can take to create a new app in Service Studio, the OutSystems IDE. You can either start from scratch or use one of dozens of sample applications as a foundation. For today’s example, I’ll build the app from scratch and walk you through all the steps to create the employee onboarding app.
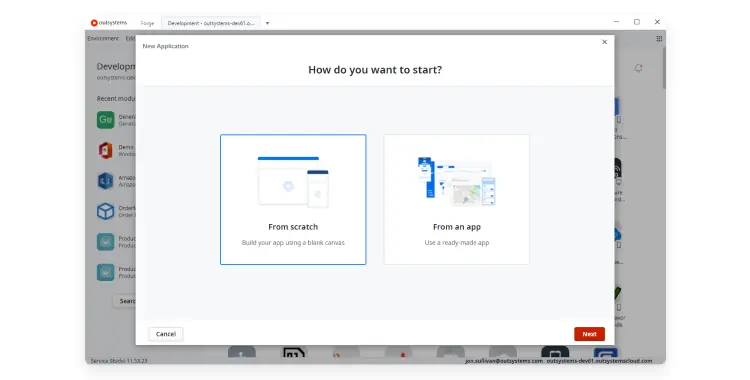
Part of setting up a new application is defining what type of app we want to build: is it web, tablet, or phone app? In this example, I’m going to build a reactive web app—which is basically an app with a responsive interface that runs in the browser and adapts the user experience to all kinds of devices and screen sizes.

If later I want to deploy the same app for phone and tablet, I can do it without writing it from scratch again. That’s because with OutSystems we can easily share data, logic and UI elements, so we can always create one type of app first and then reuse that work to create another type. In the case of a mobile app, the same code can be published on both iOS and Android. So, once again, I don’t have to build it twice.
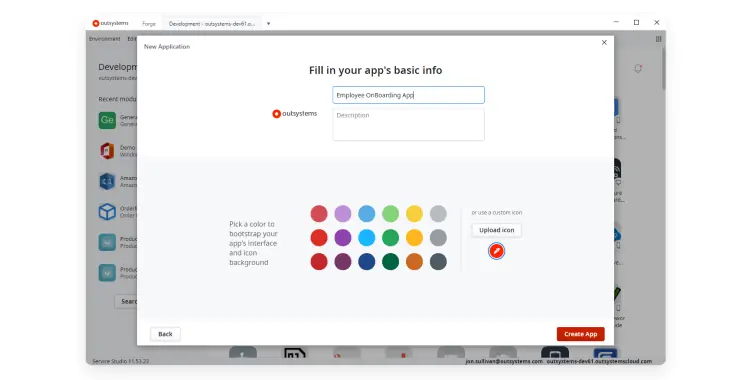
The final step in setting up a new application is filling out some basic information. Here we need to name the app, give it a description, choose the base color for CSS, and upload an icon. If you choose to upload an icon, the app will automatically kick-off the CSS with the right colors—and that’s what I’m going to do in this example.
If you’re not sure about all the details yet, don’t worry, we can change all of this later.
Step 2: Build the App Shell
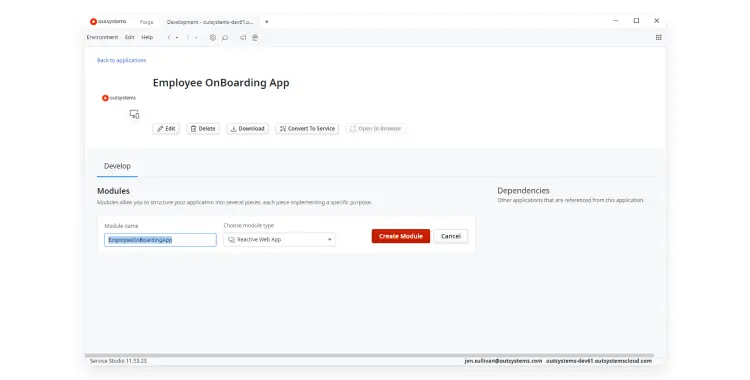
Once the new application is created, we can add and manage different modules like services, libraries, and extensions as needed.
I’m going to create a reactive web app module with the same name as my application.
And here’s what that looks like.
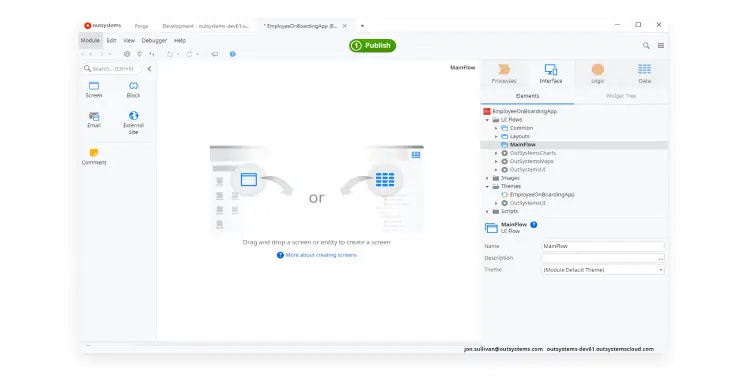
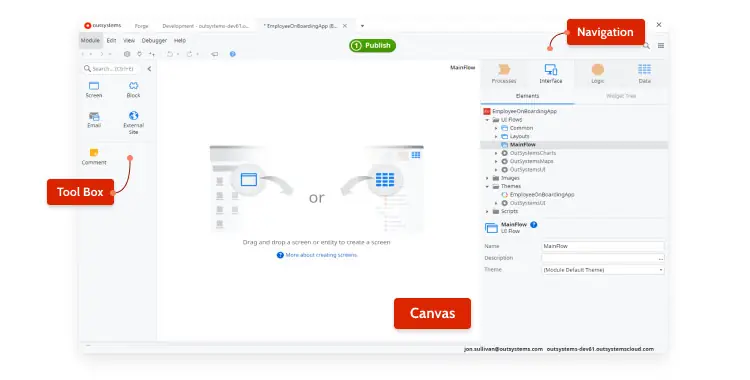
The reactive web app module creates an application shell that we can use to start building. Elements like processes, interface elements, logic elements, and data sources can be dragged and dropped into the IDE to quickly create app functionality.
The toolbox is on the left, the canvas is in the middle, and the navigation is on the right.
In this example, the first thing I’ll do is create an employee data table that’s connected to an employee database. The table can have create, read, update, and delete operations that can be dragged into the flows as needed.
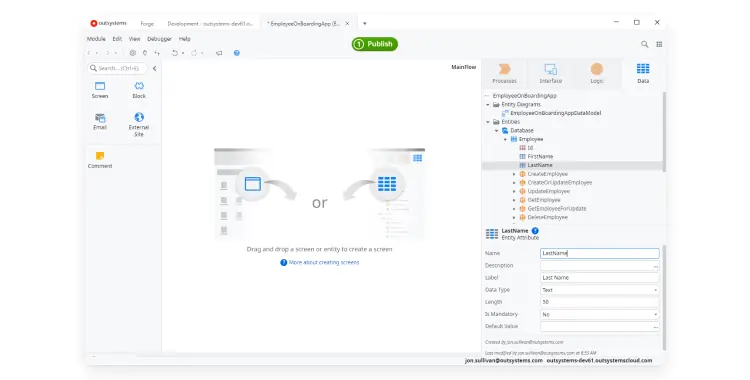
For the table, I’ll add employee attributes like first name, last name, phone, and email. As I create those names, OutSystems can infer the data type attribute based on the naming convention. I’ll also want to create a Department table; once that’s created, I can add that foreign key to the employee table by dragging a shortcut over.
Step 3: Build a Login Screen
In the Interface tab, we have access to a bunch of different controls and features. The first one I’m going to add is a login screen.
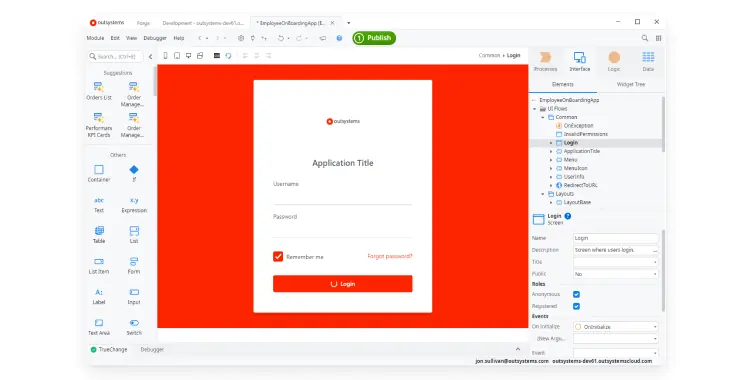
This will add a default login process featuring a login button that executes an action of going to the server to validate and authenticate the login process. This can be hooked up to login providers like Okta or social logins like Google and Facebook.
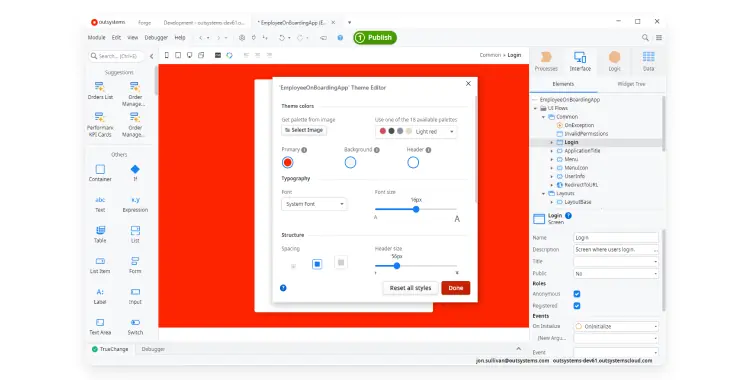
By clicking the theme editor button, I can edit the colors, fonts, backgrounds, and structure of the login theme.
Step 4: Modify the Theme with CSS
If I want to modify any element of the theme, I can do it in just a few clicks without any CSS knowledge. It’s a quick way to enhance a theme.
But, if I want to edit the CSS, I can also do it. The CSS editor shows the OutSystems UI, which is the global default.
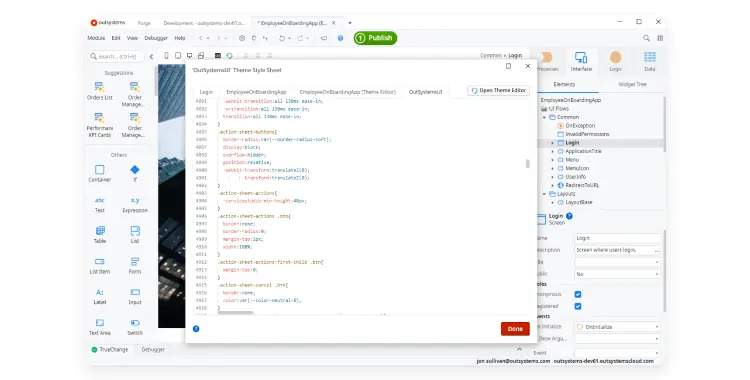
All tabs to the left of it will inherit or override the information from the OutSystems UI, allowing us to get more specific as needed as we style the overall theme, the app, and the login.
To update the code, we can use the WYSIWYG editor or directly type it in.
Step 5: Add Functionality
Now, I click on the MainFlow, which will show me folders of screens.
To create a screen, we can just drag and drop them into the canvas.
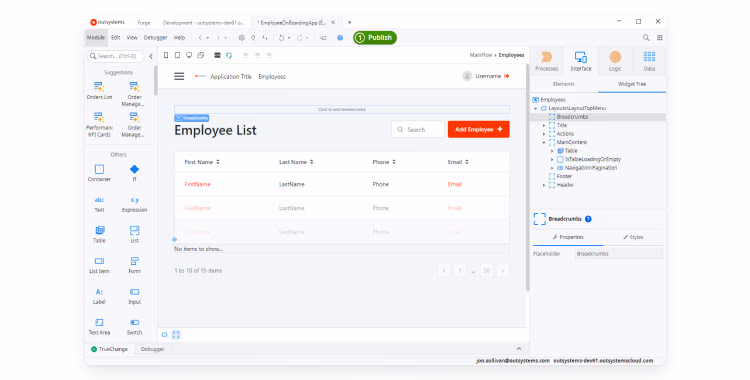
In this case, this will automatically create a list screen and a detailed screen. This will give end-users access to search for employees, update forms, etc.

Although the screens are automatically created, it doesn't mean we don’t have control over them. The platform automatically creates the screens following best practices and to give us what we’ll most likely need, but we can always design it in any way, shape or form possible, and affect every pixel in it.
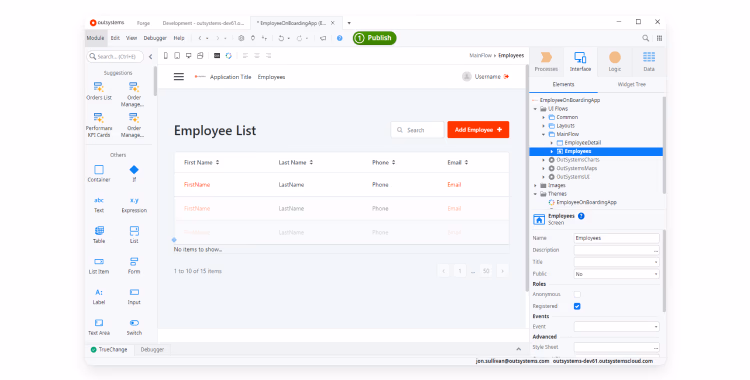
On the list, you can see that it pulled data from the data table to automatically create headers that can be sorted. It also added pagination to reduce load times, along with a search function and an Add Employee button to create a new record. If I want to add more fields, I can just drag and drop them from the tab.
Throughout the screen we have placeholders for different types of elements.
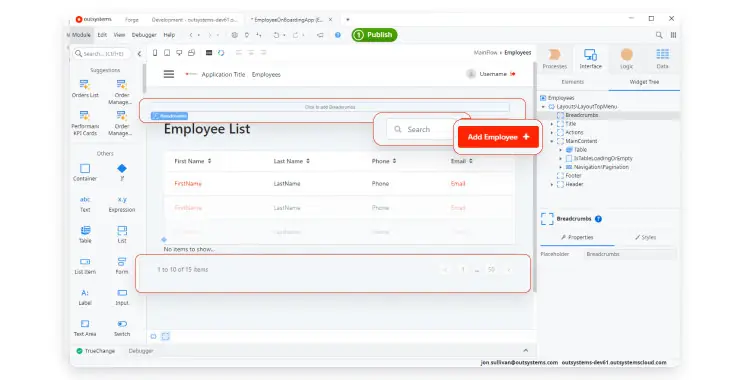
If we toggle over to the Interface tab, we can see each element in the Widget Tree. Here we can dig into the details of each widget and edit them as needed. We can also hover the modules on the canvas to move things around and make edits.
For the UI, there are only three elements you have to understand to develop in OutSystems:
- Variables that you can add
- Data fetches
- Actions.
Every UI widget we add will be hooked up to a variable or data source, or will have an action running against it. We can add and edit those in the Elements tab.
Step 6: Working with Logic Trees
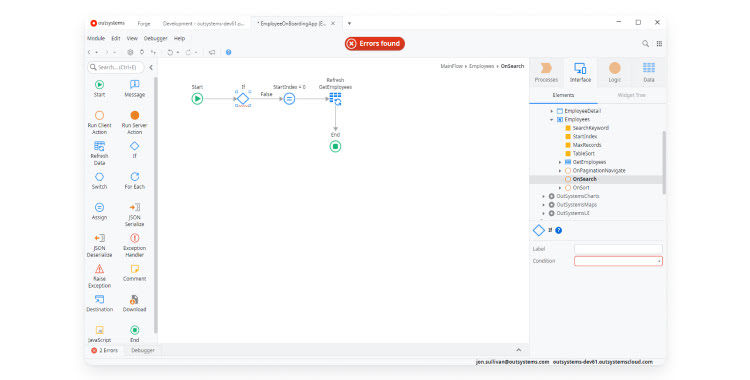
Let’s take a look at the search function as an example of what a logic tree looks like.
The visual designer shows how the logic is executed; the toolkit on the left will change to provide us with additional options.
We can drag and drop these tools onto the canvas to create more complex logic functions. We can add pretty much any logic, from “if-statements” to more complex ones.
Step 7: Check Your Work and Publish!
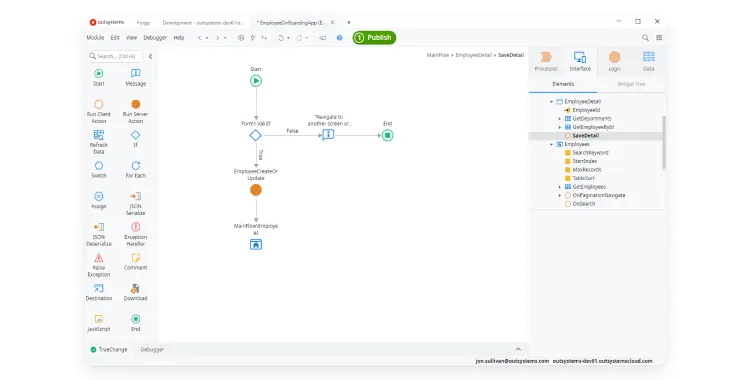
On the Employee Details screen, we’ll see a flow designer for a form to add a new employee. However, OutSystems detects issues that we’ll want to address before publishing, such as security issues and performance warnings like calling the service twice.
Once we’re ready to go, all we have to do is click the green button at the top for one-click publish. This will store a new version to the cloud, giving us the ability to revert to older versions as needed. We can also merge the code with other developers’ code to see the differences between versions.
The publish action compiles and updates the database scripts, updates the database model, and deploys the web application. Once it’s published, the green button will turn to a blue Open in Browser button that allows us to try the application out.
Ready to Give It a Try ?
This is just a simple, almost “Hello, World!” application to show you how developing with OutSystems looks like. From here, the sky's the limit. OutSystems was designed to build modern enterprise-grade applications and experiences, with a great amount of flexibility through accelerators or even custom code if necessary.
If you want to explore it further, you can sign-up for our free edition here.