OutSystems: The leading AI-powered low-code platform

If you’re reading this post, chances are that you’ve just built or are planning to build an API to extend your applications built with a low-code platform, and are now wondering how the server can inform your users of the status of their requests.
In this blog post, I’ll show you how you can implement HTTP status codes when exposing a web service in OutSystems low-code platform. If you want to learn more about the consumer perspective, I invite you to take a look at my previous article. Let’s get started!

Starting from the Basics: Concepts
If this is your first rodeo, Apigee (Google Cloud's API Management Platform) has a great blog post for some conceptual background: RESTful API Design: What About Errors? In fact, we will use that blog post as a guide for this exercise.
Apigee also has several interesting e-books dedicated to API building. One of my personal favorites is Brian Mulloy’s eBook Web API Design - Crafting Interfaces that Developers Love.
As Brian points out, the API that you are designing is a black box for developers, and most prefer a trial and error approach. For these two reasons, it’s very important to communicate errors clearly and richly.
Mulloy also mentions that the most popular APIs use three distinct patterns:
- Abstract error message and usage of an HTTP status error code
- Rich error message and usage of an HTTP status error code
- Error message but always returning HTTP 200 success code
Best Practices When Implementing HTTP Status Codes
Brian Mulloy recommends that we use HTTP status codes and map them to the standard meaning. There are plenty of flavors for our needs (check the wiki), including the iconic HTTP 418, I'm a teapot.
When implementing the HTTP status code, we should apply at least three codes:
- 200 - OK (all is good)
- 400 - Bad Request (the client did something wrong)
- 500 - Internal Server Error (the API did something wrong)
Now that you know the basics, let’s dive into the details.
Any OutSystems API implements the following built-in HTTP status codes when working with exposed REST API methods: 200, 400, 401, 403, 404, 405, 406, 415, and 500. Note that most of them are tied to specific events of the platform but can be customized to your needs.
For example, a "404 Not Found" is returned by OutSystems if a REST API method isn’t found. However, you can still raise a 404 if the result of a query is empty.
Anatomy of a REST Call in OutSystems
Here’s what happens when you call an API in OutSystems:
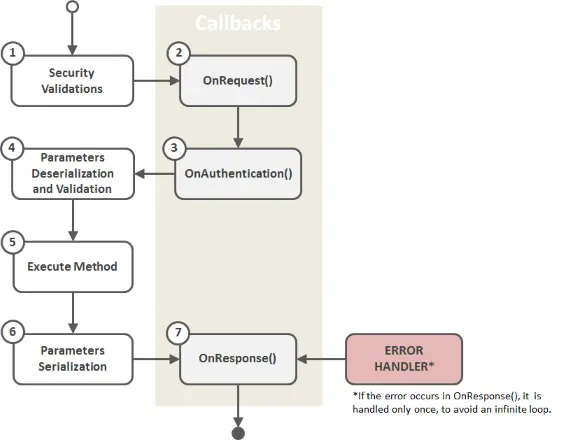
- Security Validations: after receiving the REST API Method request, OutSystems executes the security validations according to the settings in REST API properties HTTP Security and Internal Access Only.
- OnRequest(): OnRequest callback allows you to run logic over the requests after receiving them.
- OnAuthentication(): OnAuthentication callback allows you to add basic authentication or custom authentication to requests.
- Parameters Deserialization and Validation: deserialization of the input parameters and validation of the data types, mandatory values, etc.
- Execute Method: executes the action that implements the REST API Method.
- Parameters Serialization: serialization of the output parameters to return in the response;
- OnResponse(): OnResponse callback allows you to run logic over the responses before sending them. It’s always executed, even in an error situation.
Step-by-Step Guide to Implement the HTTP Status Codes
Now that you know everything that’s happening under the hood, you’re ready to implement the HTTP status code when exposing a REST API in OutSystems.
Step 1: Taking Control Over the OutSystems Exception Handling
As mentioned before, OutSystems uses several HTTP status codes when working with exposed REST API methods.
This should be enough for our needs, but we do want to take a step further and present a nice rich error detail response while being in total control when an exception is raised.
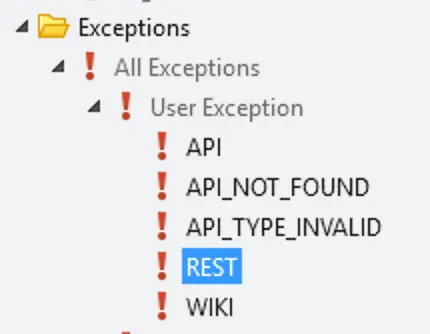
The default exception for REST is represented by:
{
    "Errors": [
        "The 'Id' URL parameter is missing in the request.",
        "The request body is missing."
    ],
    "StatusCode": 400
}
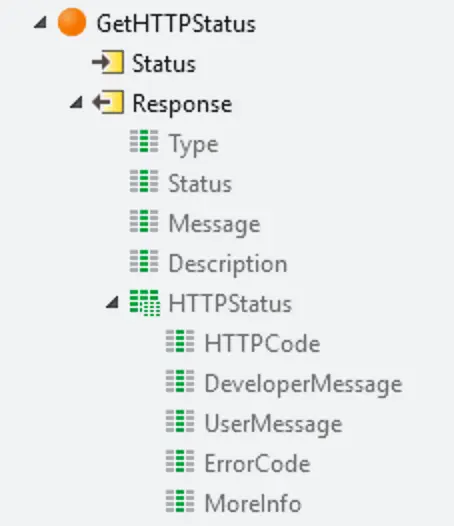
But we want to add some richness to it, something like this:
{"HTTPStatus": {
    "HTTPCode": 404,
    "developerMessage": "Not Found",
    "userMessage": "The server can not find the requested resource. In the browser, this means the URL is not recognized. In an API, this can also mean that the endpoint is valid but the resource itself does not exist. Servers may also send this response instead of 403 to hide the existence of a resource from an unauthorized client. This response code is probably the most famous one due to its frequent occurrence on the web.",
    "errorCode": "404",
    "moreInfo": "For more information please visit https://en.wikipedia.org/wiki/List_of_HTTP_status_codes"
  }
}
}
So, we should start by creating this structure, including it on our API response and a user exception.
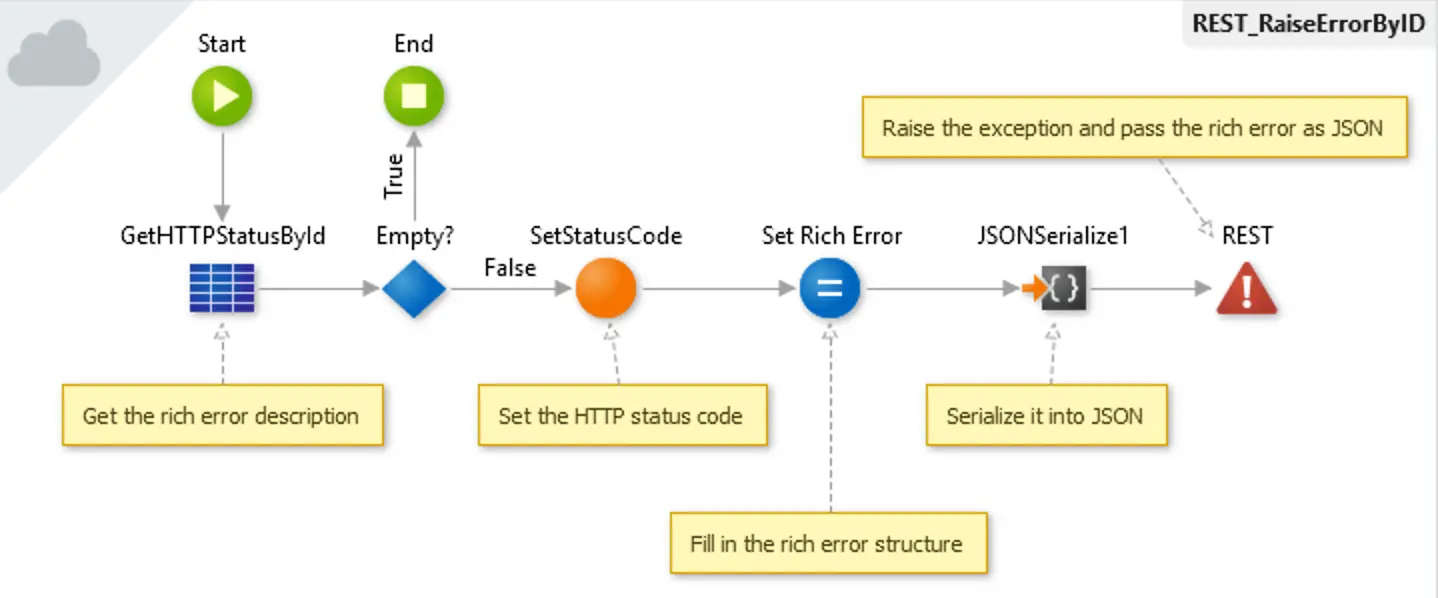
After this, let's create a generic method to raise the exception. (Please note that the odd display of the flow is just to make it look better on this blog post.)
Step 2: Implementing the Exceptions
Now let's walk through the implementation of the exception.
Authentication
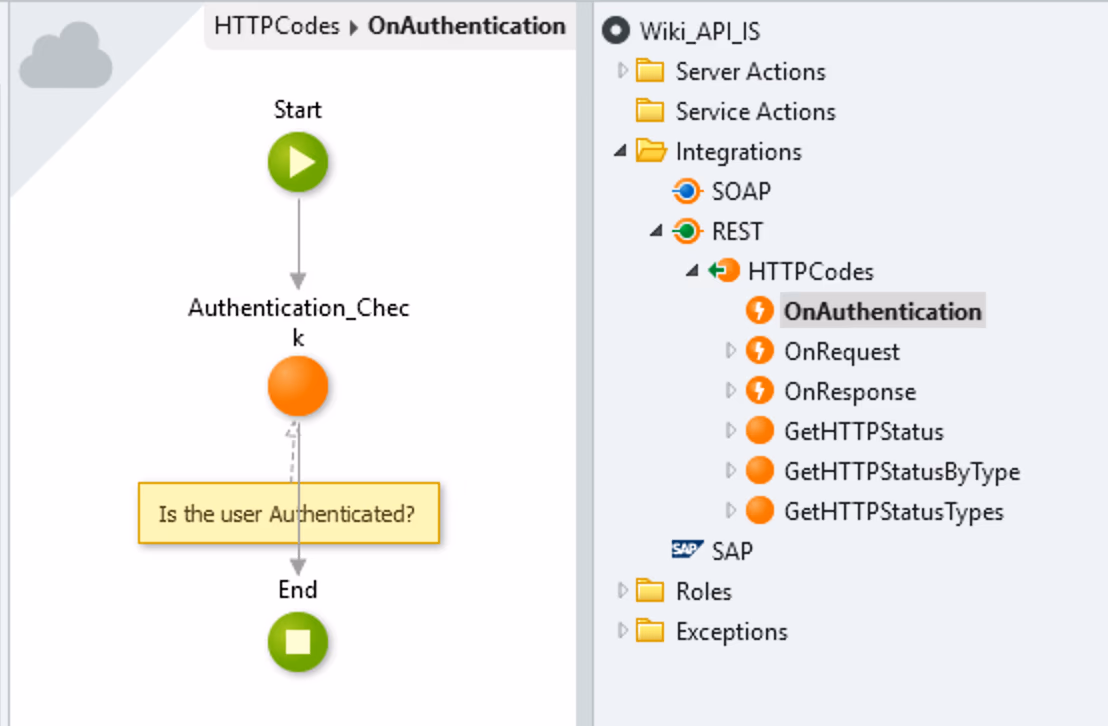
The first thing that’ll run is the authentication check. Whatever authentication method you're using, just raise the appropriate exception if it fails. Note that the exception is raised by the generic method created above.
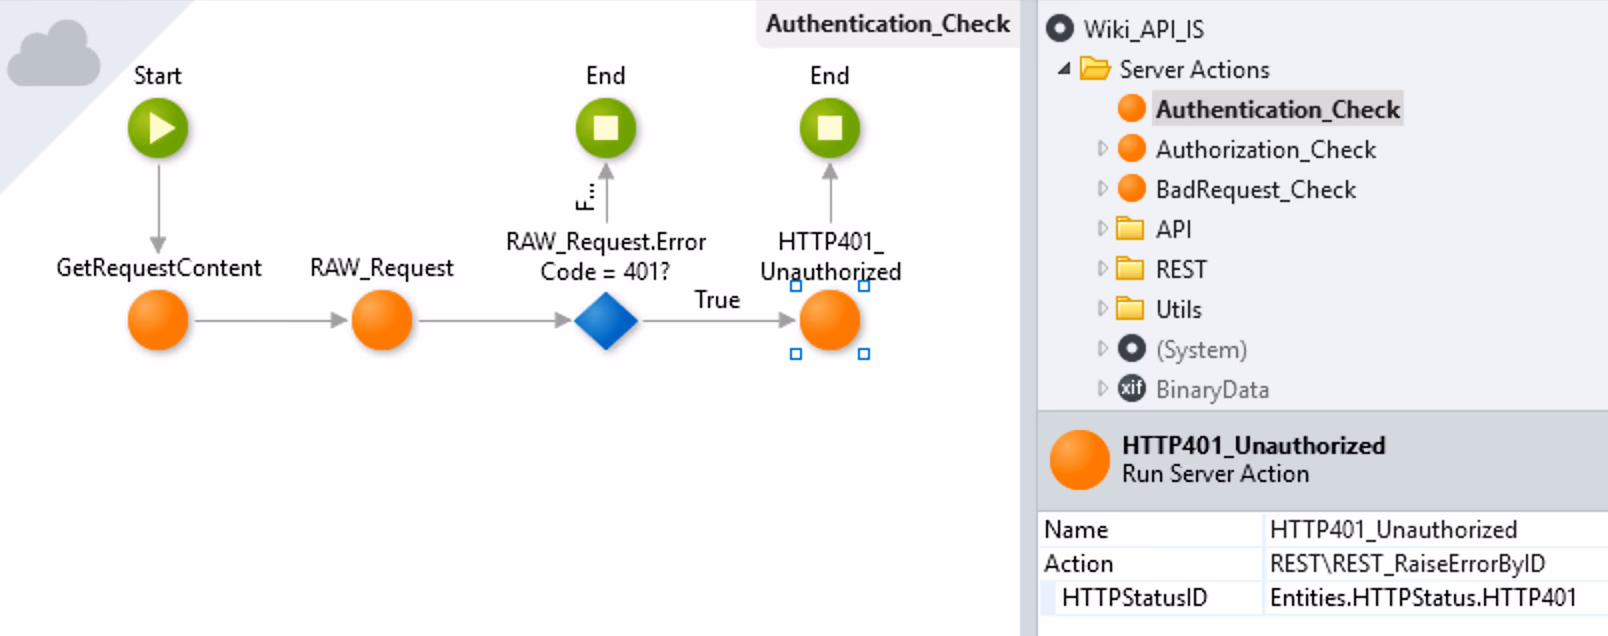
From this point on, you just need to replicate the same concept for Authorization, Request format, and the exceptions coming from the implementation itself.
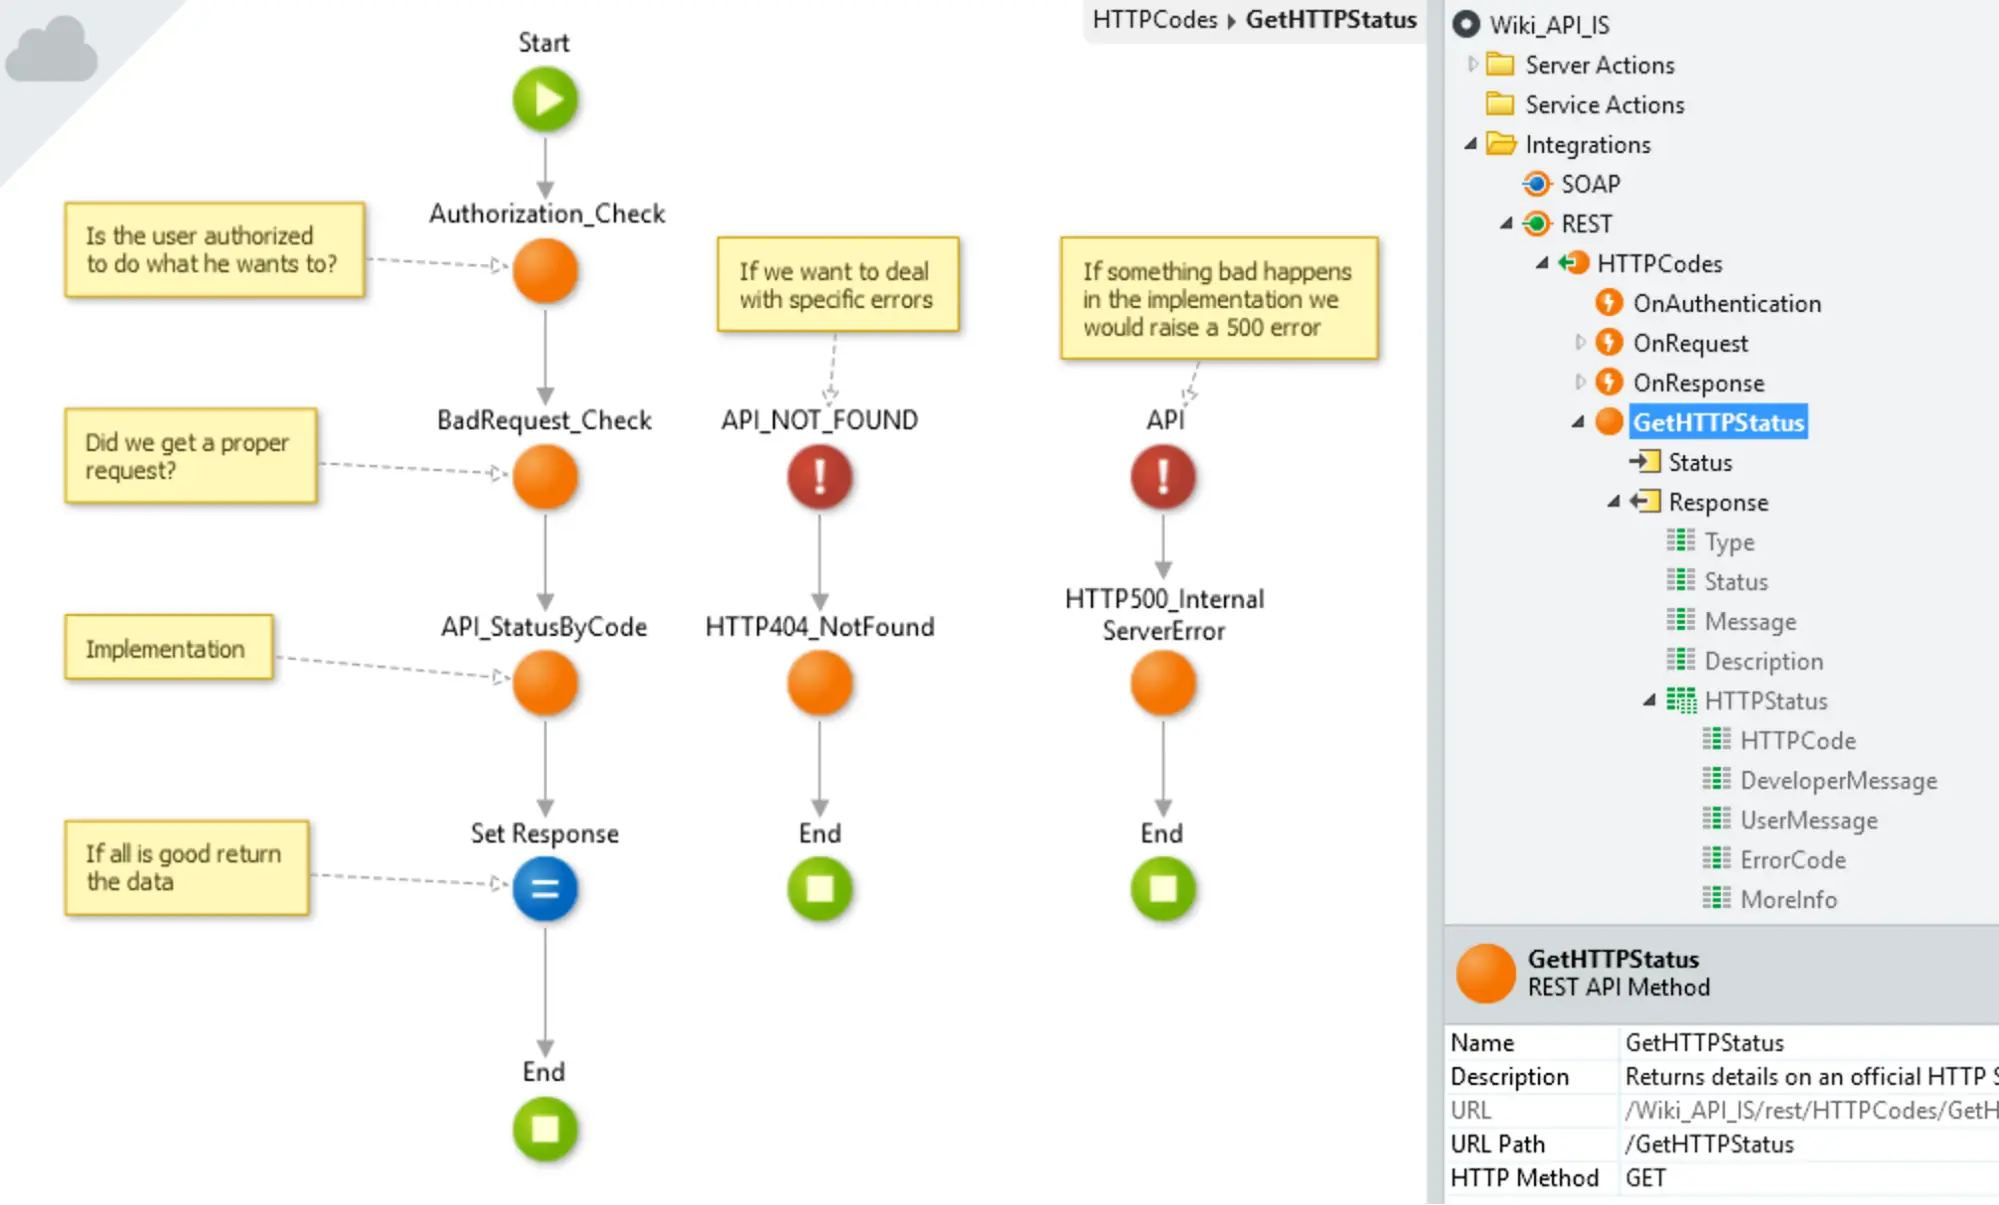
Authorization
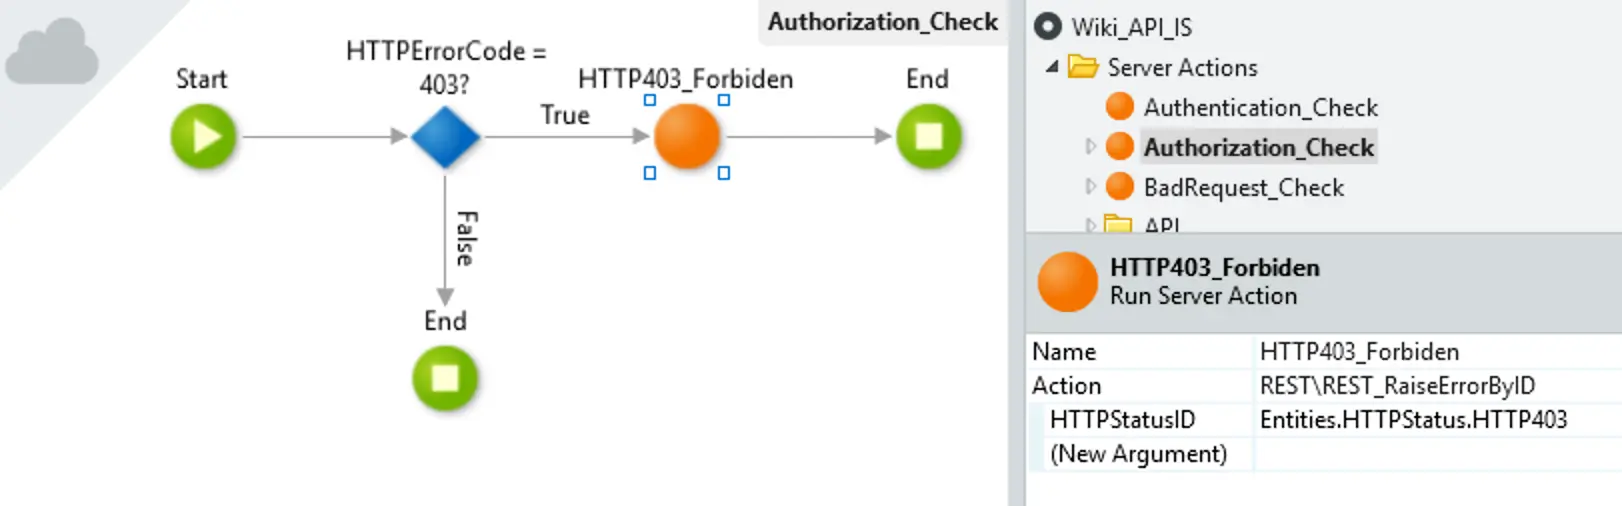
Request Validation
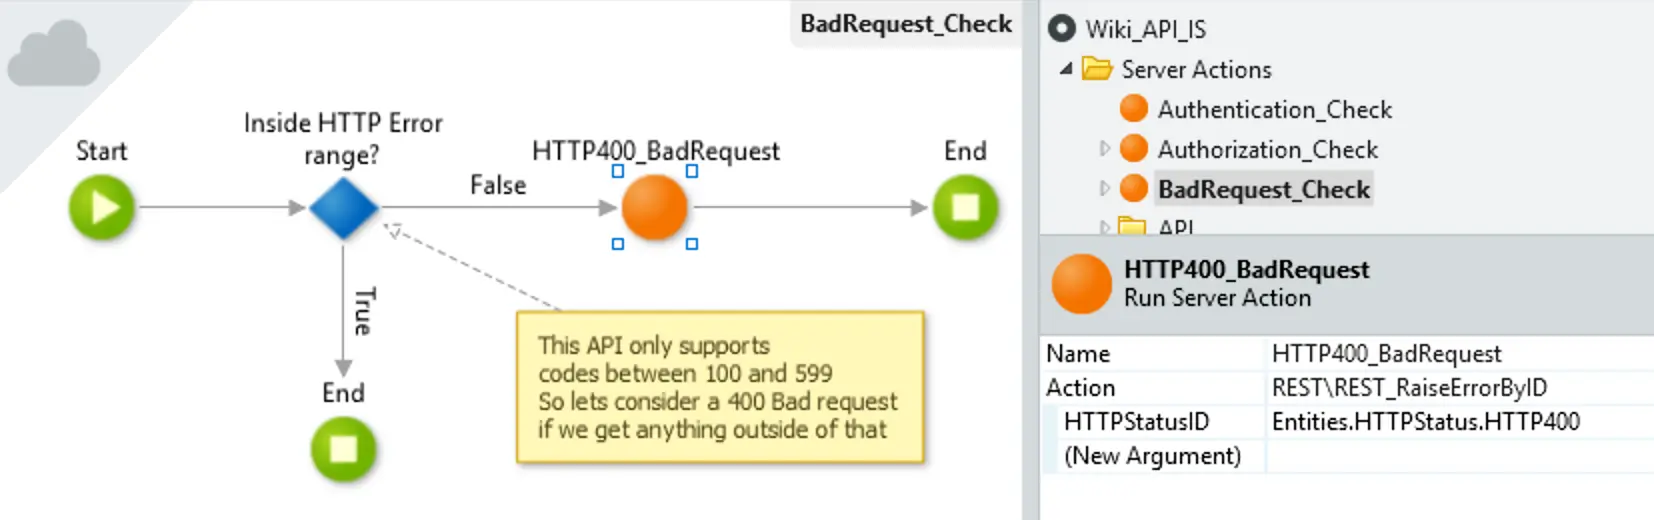
Inside the Implementation
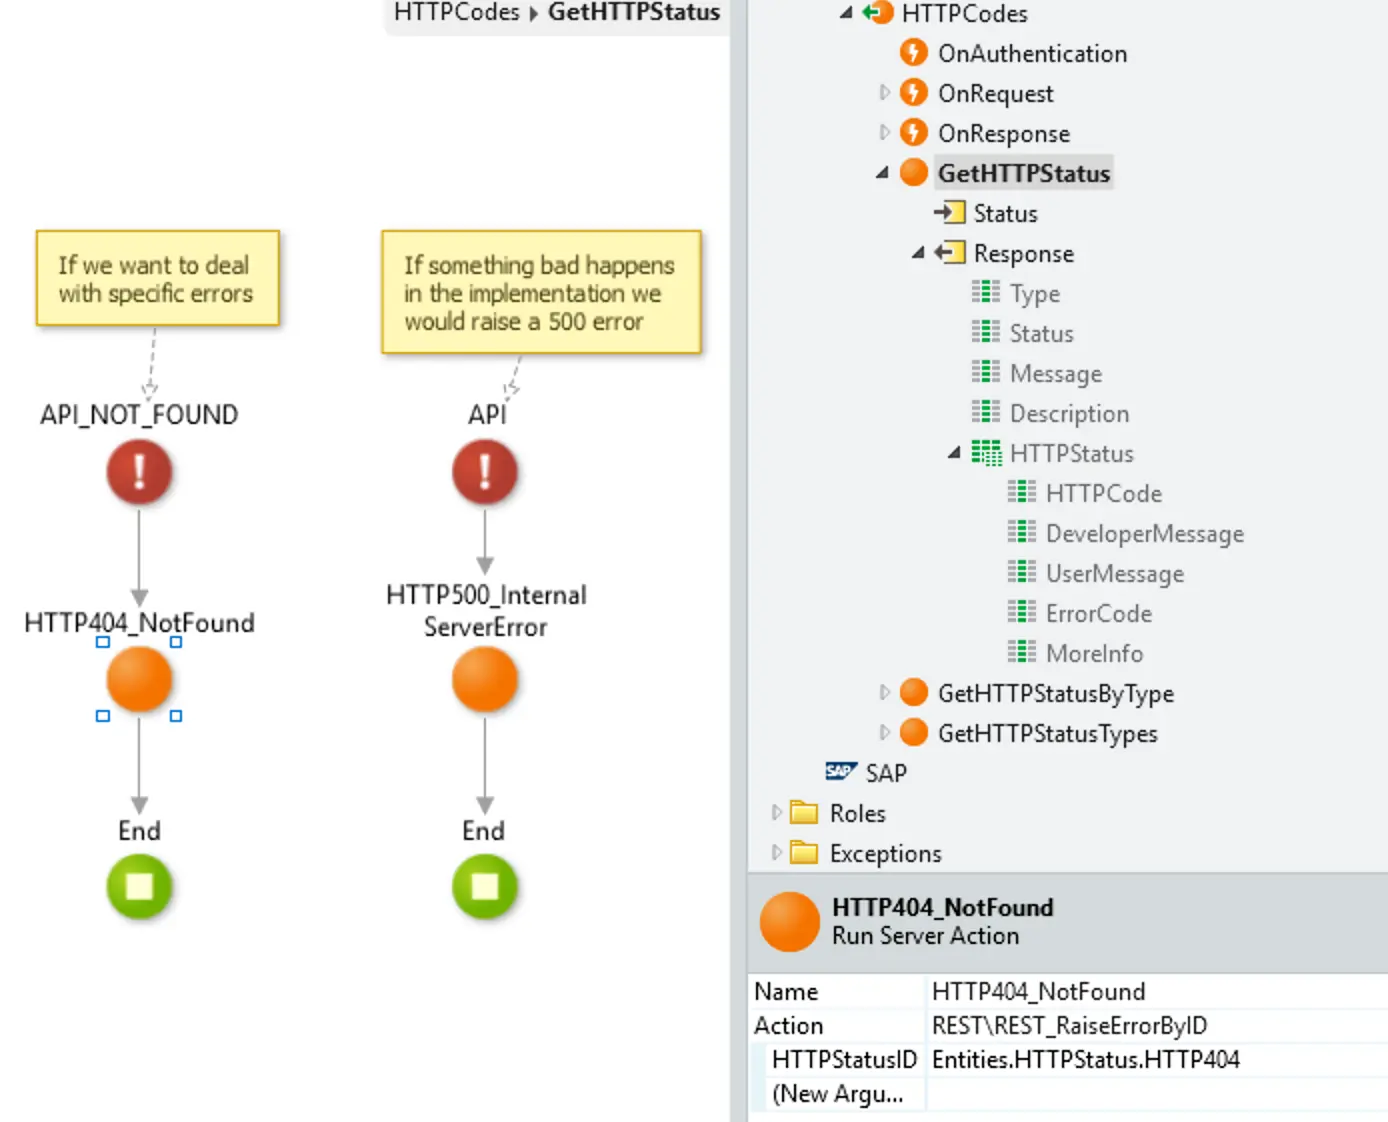
Here’s where you surface the exceptions coming from the implementation into the API itself.

I went a bit overboard with this by actually translating the exceptions coming from the implementation into API exceptions.
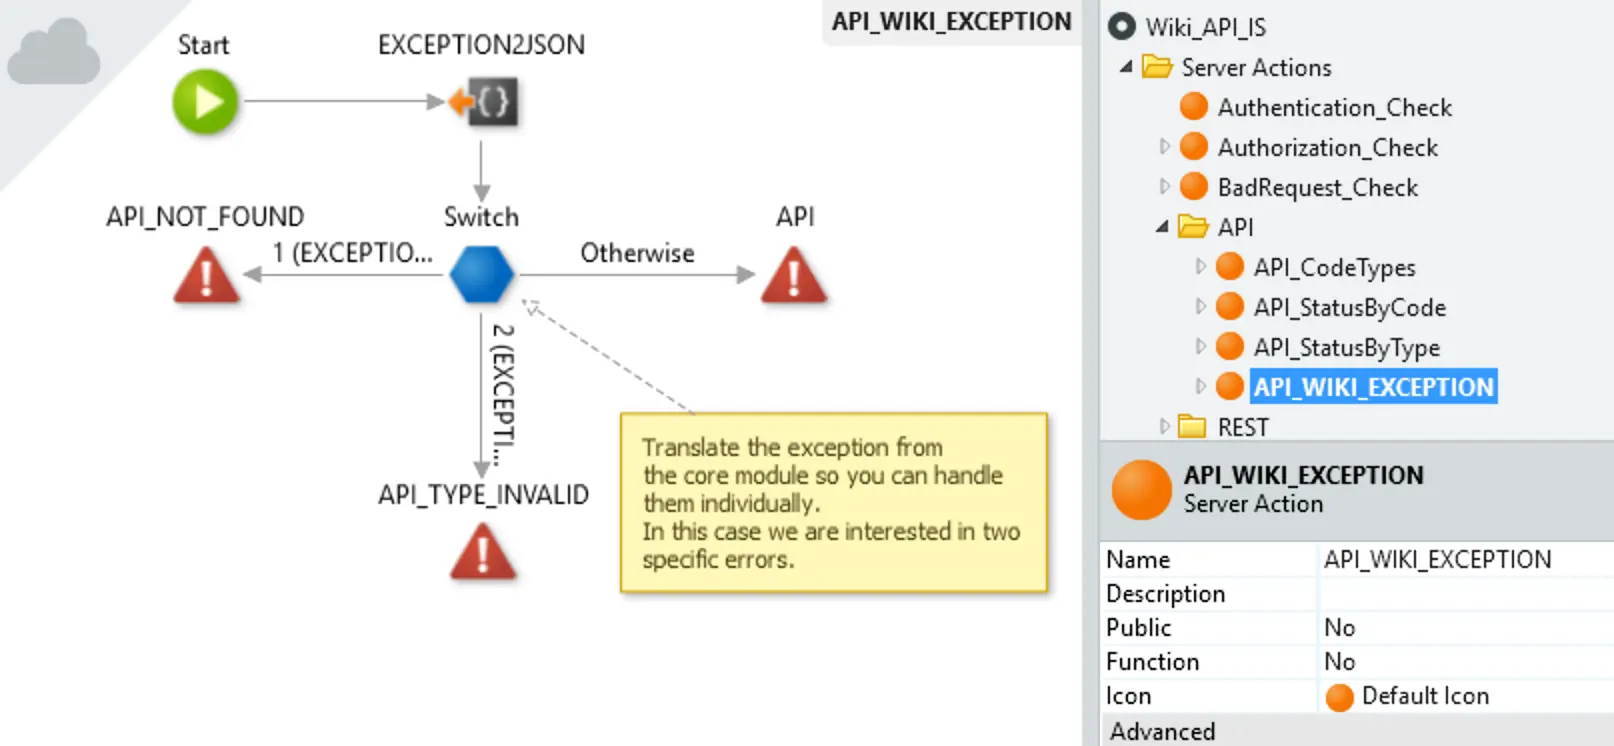
This is done by catching all exceptions on the public actions of the implementation, identifying them, and re-raising them as REST user exceptions from this module.
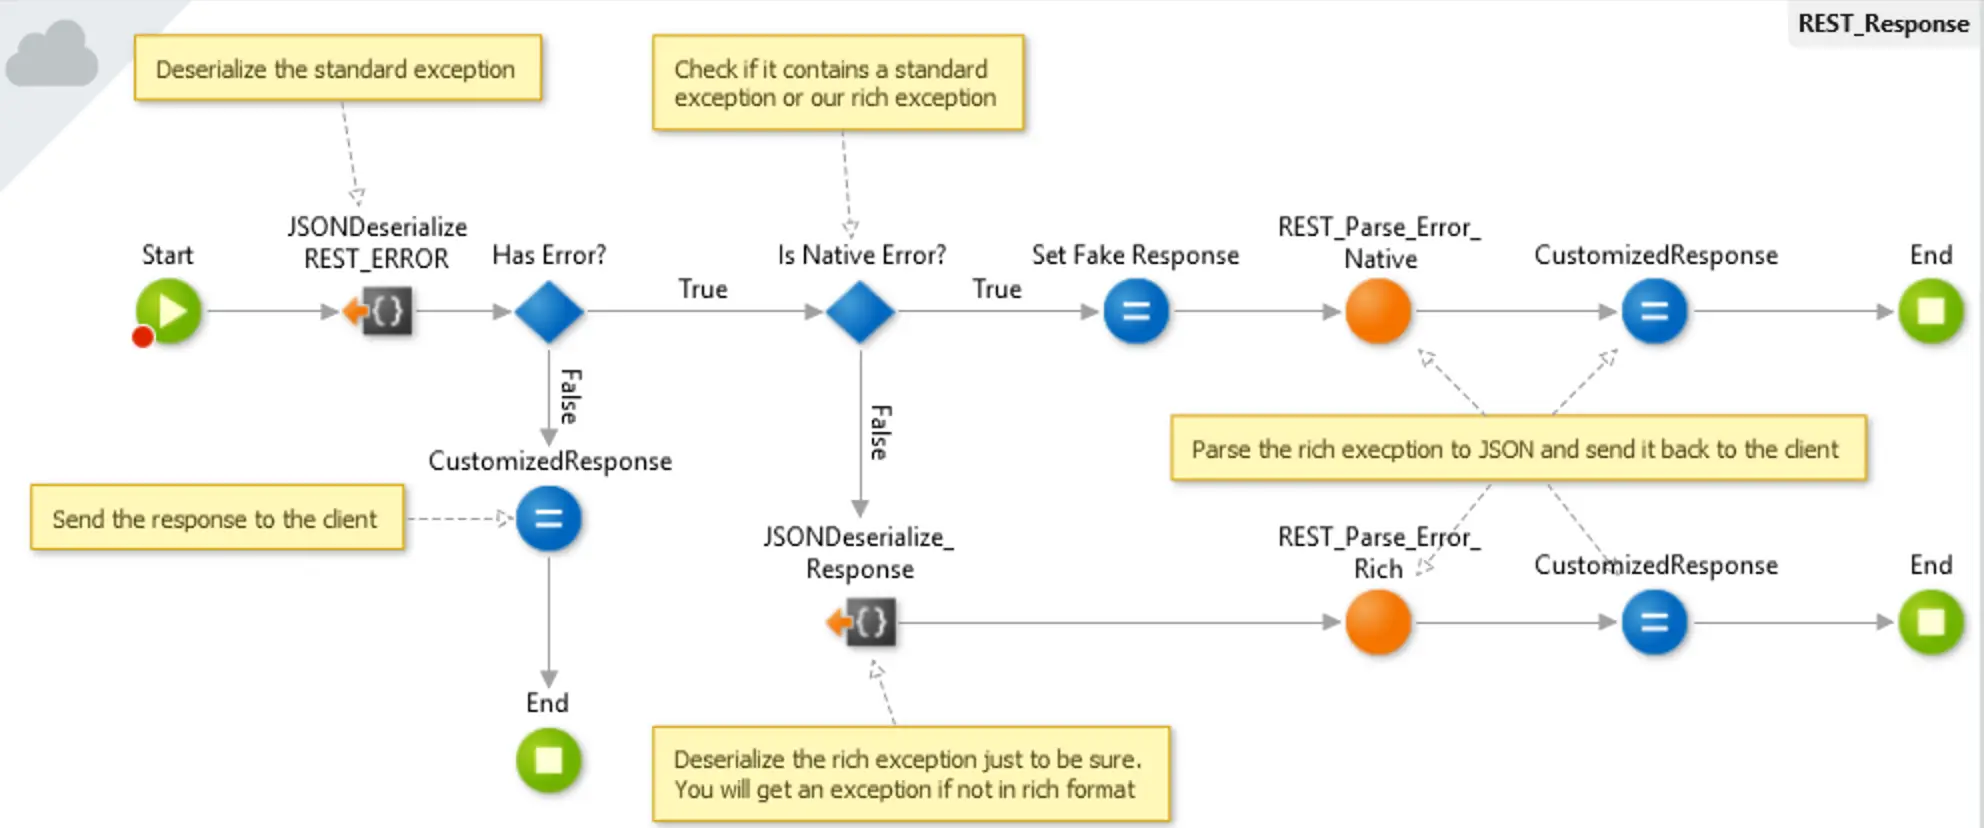
Step 3: Customizing the Response
To customize your responses, you need to start by creating a generic action to handle the customized response.
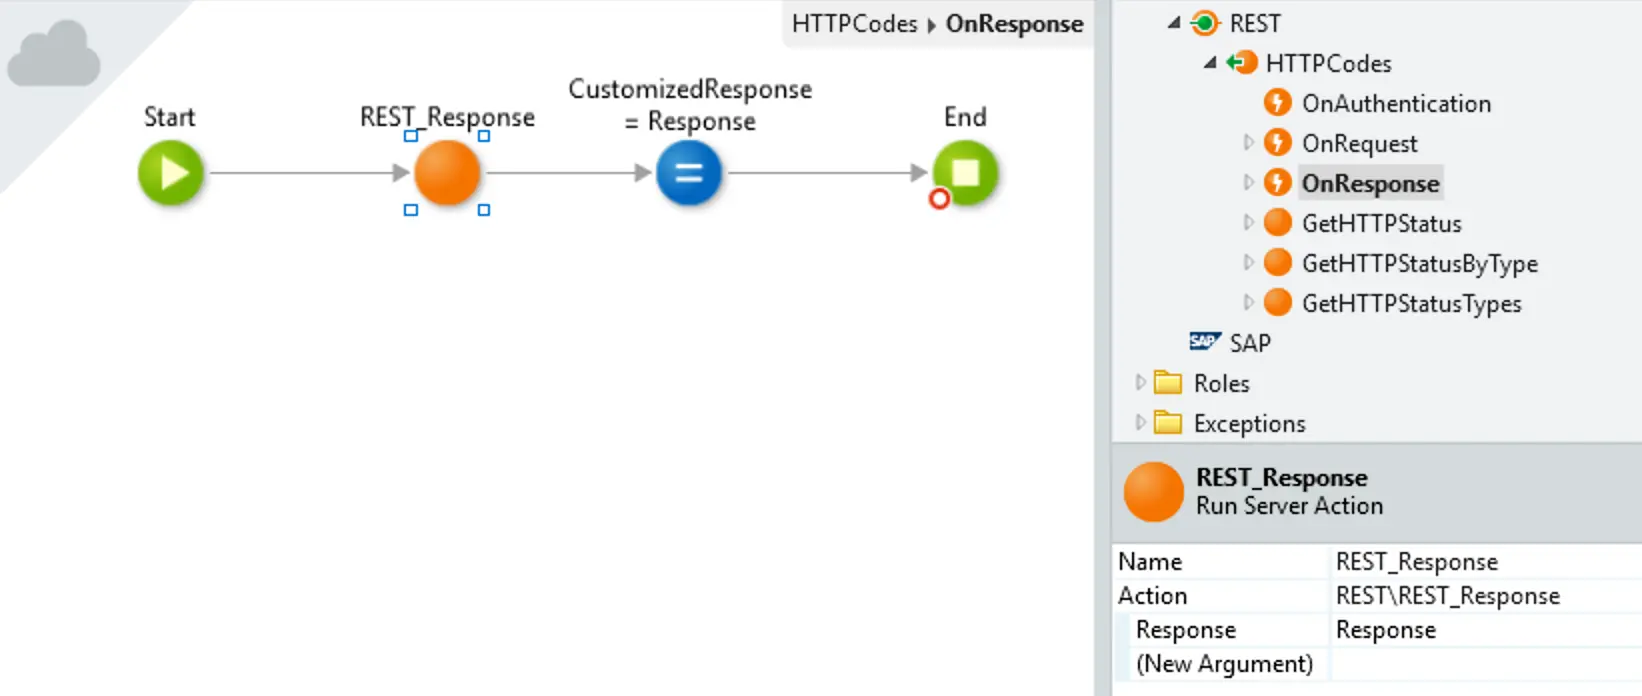
I know it looks complex, but it is actually quite straightforward. Here’s how to do it:
- Check if the response is an exception or a normal response
- If it’s a normal response just let the request go forward
- In the example, a simple Deserialize works fine, but depending on your response, you may need a more complex parse
- Check if the exception is a standard exception or a rich exception
- If it’s standard, then parse it into a rich exception
- Parse the rich exception into JSON
- Send the JSON back to the client
Get the Component
I’ve published the component in the OutSystems Forge. Give it a try and go create those APIs.