Creating a Component to Send Notifications Using Pushwoosh
Many developers ask about how to create components for the Forge, an open source repository of code for the OutSystems platform.
Recently I had to look into the several integrations available for Pushwoosh and noticed there weren't any components available as a "library" for Reactive Web and Mobile applications. So why not use this example and create a walkthrough on building it?
As a side note: In our community, the first thing that comes to mind when Pushwoosh is mentioned is sending notifications to your app. However, Pushwoosh is so much more than that. It is a complete marketing platform for your app.
What Is a Good Component?
Of course there is a complete guide to create components available, and I invite you to take a look at it.
But if I had to put it in one sentence, I would say a good component makes the developer’s life easier. In essence, it should:
- Be agnostic of any application context;
- Be reusable by several applications;
- Be a piece of the infrastructure of your factory without causing any conflicts.
Why a Library?
A Library is a module type that helps you lay the foundations of your application. Libraries have a direct fit in the Foundation Layer of the Architecture Canvas architecture tool and allow you to reduce the number of dependencies in a given environment.
The Library module type was designed with the following principles in mind:
- Libraries are stateless. They do not store information in the database, and they do not have direct access to Entities.
- The elements of a library are only deployed in the context of consumer applications. They are not deployed as standalone applications, reducing the load in the Platform Server's Application Server.
See more details in our documentation here.
Why Pushwoosh?
I selected Pushwoosh for this walkthrough because it presents several challenges both in configuration and implementation. It has Javascript events and methods, a service worker, a REST API, and a way to configure that is not friendly to the platform’s idiosyncrasies.
Let's get started!
Setting Up the App
Go ahead, navigate to Pushwoosh and register yourself for a free account. Follow the setup procedure for a web application, you'll also need to do some setup for firebase on your google.com account.
There are a few key components to start working with Pushwoosh. We are interested in the Web SDK 3.0. You can check the documentation here.
- The core javascript (pushwoosh-web-notifications.js)
- The service worker (pushwoosh-service-worker.js)
- The initialization script
- The worker registration script
- The manifest file
All of the above create issues on the platform, either because these files contain dynamic configurations that can only be inserted in static files or, because of the sequence the platform loads files, the configurations kick in out of order.
In the end, this is what I've settled for:
Loading the pushwoosh-web-notifications.js into your scripts area has pros and cons. You could download it from the CDN when the app starts, but including it on your app will save you from some unexpected upgrades, which could break something on your code. The disadvantage is that if some annoying bug is fixed on the SDK, you have to manually reload it.
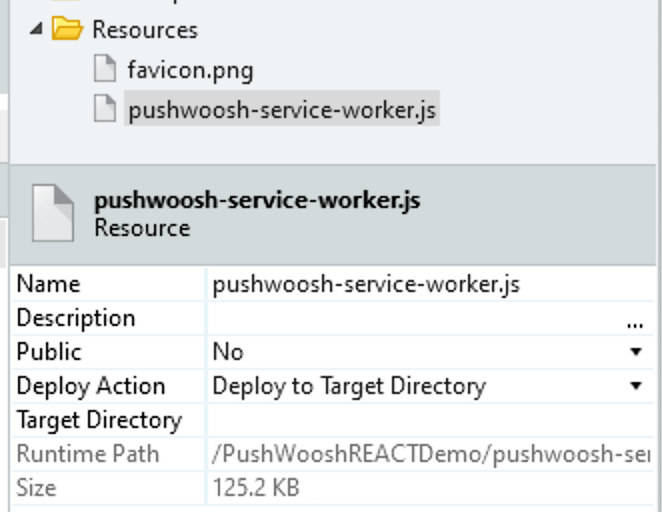
Service Worker
Place the pushwoosh-service-worker.js under resources on your main app and change the deploy action to Deploy to Target Directory so that the runtime path ends up on the root of your app. This is necessary because the scope of a service worker can be reduced but not increased. If the service worker ends up on a lower folder, its scope is limited to that folder.
If you are using a PWA, please note that browsers do not allow two different Service Workers to be registered at the same time, and a service worker will exist for your PWA. However, you can always import to the original service worker. Check out the documentation "Adding custom service worker".
In the end, your app should contain only the service worker deployed to the target directory.
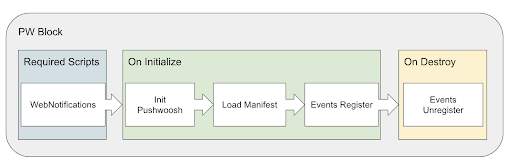
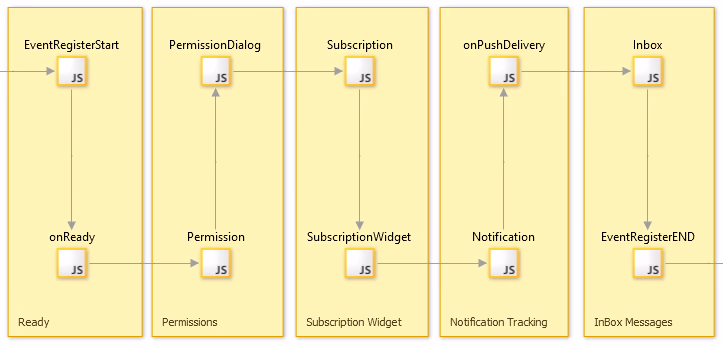
Building the Library
Pushwoosh Web SDK 3.0 has javascript events and methods. The events should be handled using a block, so that the developer can implement their handles on the application using the platform events mechanisms. The methods should be implemented using public client actions.
Events
We start by registering the events to point to the block client actions so that when the event is triggered within the Pushwoosh object, it can be propagated on the block.
This is done in several steps:
- Create an event for the block;
- Create a block client action to trigger the event;
- Reference that action on the event registration.
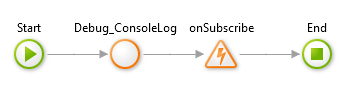
So from the original documentation, this

becomes
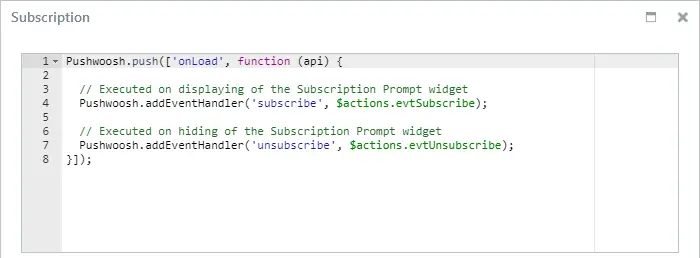
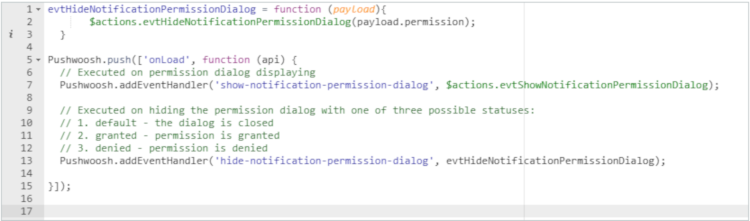
and the evtSubscribe looks like this
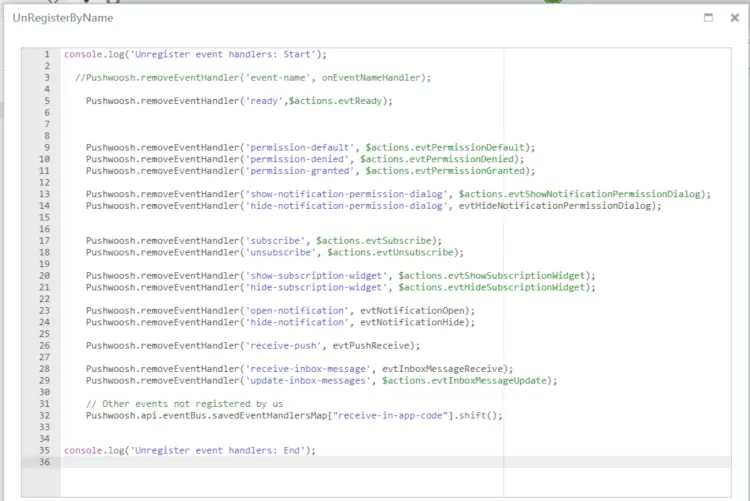
You should have a generic event registration triggered on the OnInitialize of the block and an event unregistration triggered on the onDestroy of the block, since the object belongs to the app, if an event is triggered by the javascript object on a screen that does not have the block, you'll get an error.
On the example, the EventRegistration looks like this
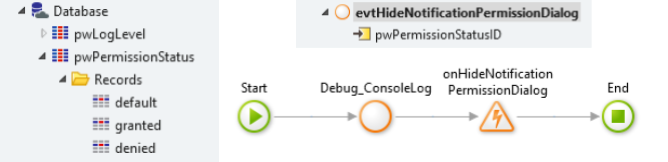
Some events pass simple information, for example, the onHideNotificationPermissionDialog
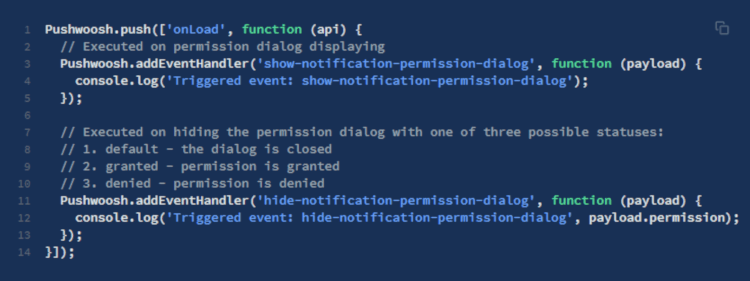
outputs, 'default', 'granted' or 'denied'. We should capture this information and send it on the platform event. For this particular case we can even create a static entity with this information and convert the output to the static identifier.
Some other events output something a bit more complex. We can try JSON.stringify() the javascript object directly or go a safer way and create our own object and serialize them into platform structures.
For example,
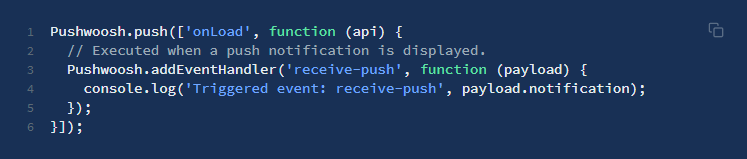
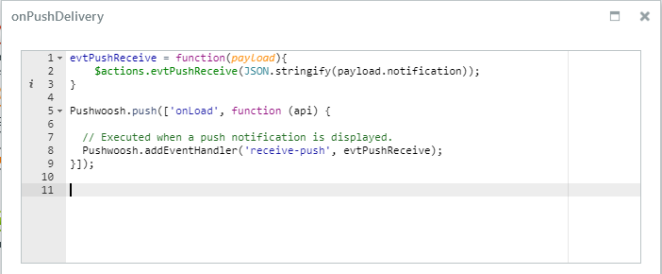
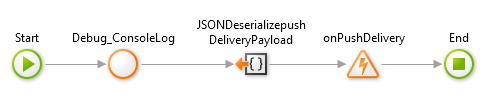
translates to:
If you want to know more about adding and removing event handlers in javascript, check out this article by Davide Rama.
For the evtPushReceive:
When implementing event handlers in javascript, the key is to find a way to unregister them on the onDestroy of the block so that when you navigate from one page to the other, and an event fires, you won’t get the error that the method associated with it does not exist.
Methods
The methods can be translated to public client actions. The interesting thing about these is the fact that they are javascript promises.
For example, the Pushwoosh.getParams()
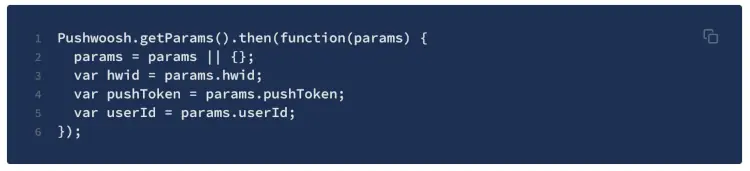
can be implemented like this:
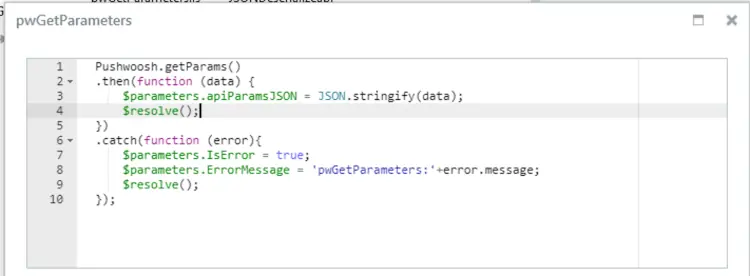
I like to have a catch because if something goes wrong inside the promise, it is very difficult to debug due to its async nature.
The complete public client action with the error handler:
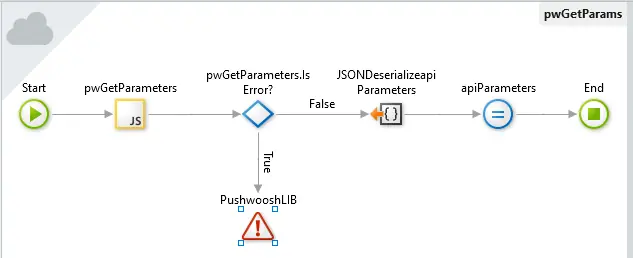
The rest of the methods follow the same pattern.
More Implementations
The Pushwoosh javascript object offers a few more interesting methods which will allow you to track and tag what your users are doing on your app:
- User Register/Unregister: Allows you to register a user of your app on the pushwoosh platform. You can use something as simple as the user id or any other reference you may like.
- Tags: On the Pushwoosh platform, you can create tags and populate them as you see fit. This will allow you to contextualize the user experience and create statistics from the pushwoosh platform.
- Events: You can also create application events and fire them on your app as needed. The pushwoosh platform will then track these events for each user.
The REST API
Pushwoosh also provides an extensive REST API for your application to interact with the platform.
Messages API
There are several methods to interact with this API, create, delete, get details, create targeted, get push history, get results, and cancel messages. They all use POST.
The authentication is very straightforward, an auth (API token) and application code parameters are expected on the request body. Some methods only use the auth parameter.
However, some of the JSON on the requests are not OutSystems friendly, for example, on the content section of the createMessage request:

It should be replaced by a list of key/value pairs.
This means we are going to use ardoJSON to tweak these.
ardoJSON is an older library (or, I should say, mature) created primarily for serializing and deserializing JSON into and from OutSystems structures at a time (v 9.x) where the platform didn't do this. However, it is still very valuable since it includes 2 methods, the Objectify and Listify, which handle this use case.
These methods allow you to automatically translate to and from a dynamic JSON object for e.g:
{
   "en":"english",
   "pt":"portuguese",
   "es":"spanish"
}
to a key/value pair, e.g.
[
   {
      "key":"en",
      "value":"english"
   },
   {
      "key":"pt",
      "value":"portuguese"
   },
   {
      "key":"es",
      "value":"spanish"
   }
]
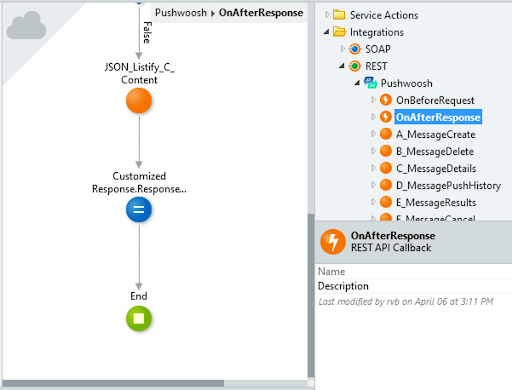
So on the onAfterRequest of the API, we call the Listify to translate from the key/value pair into the object:
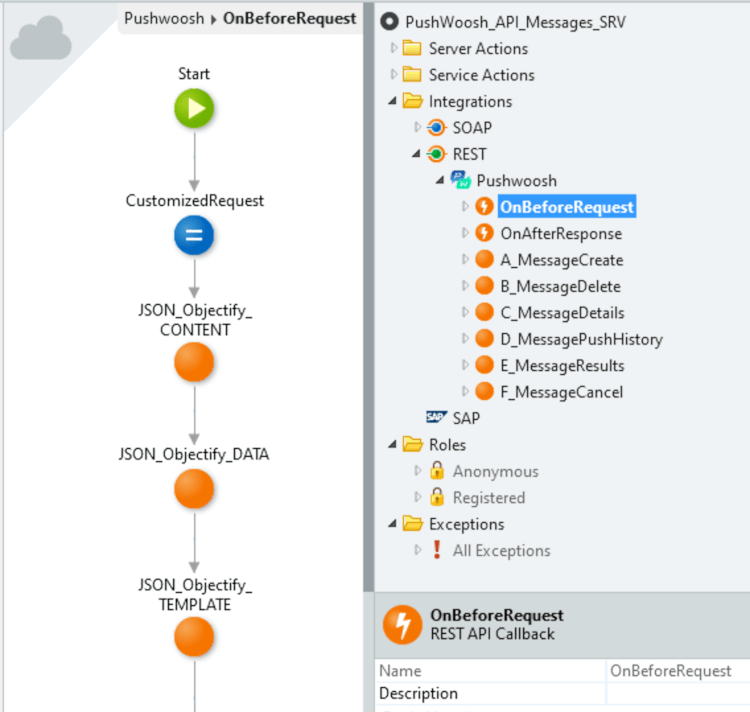
And, on the onBeforeRequest of the API, we call the Objectify to translate the JSON object to a name/value pair:
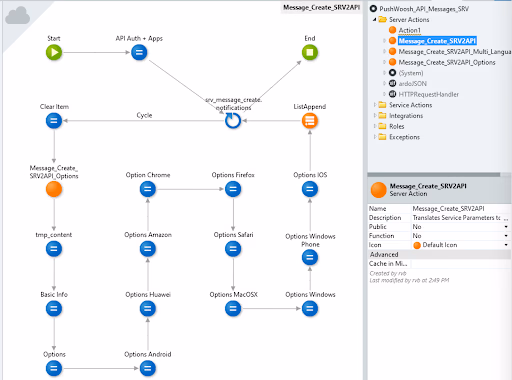
Finally, we abstract (and eventually simplify) the use of the API for the developer. By creating a specific structure to expose the methods in OutSystems and then translate into the structures used by the API itself.
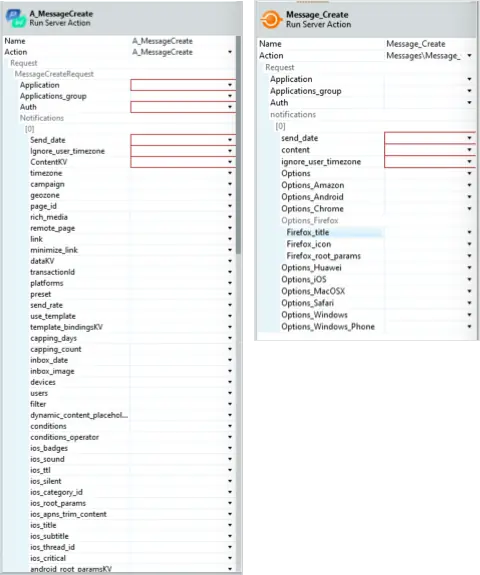
So, compare between using the direct API with its gazillion parameter to the OutSystems method:
Where Is It?
As usual, there is a component available on the forge, although this is still work in progress and will not work on your PWA app… yet.